Printing Photoshop/Illustrator CS4 on Mac and PC
Contents
Setting up work for printing on a PC
Set Printers Up In Bonjour
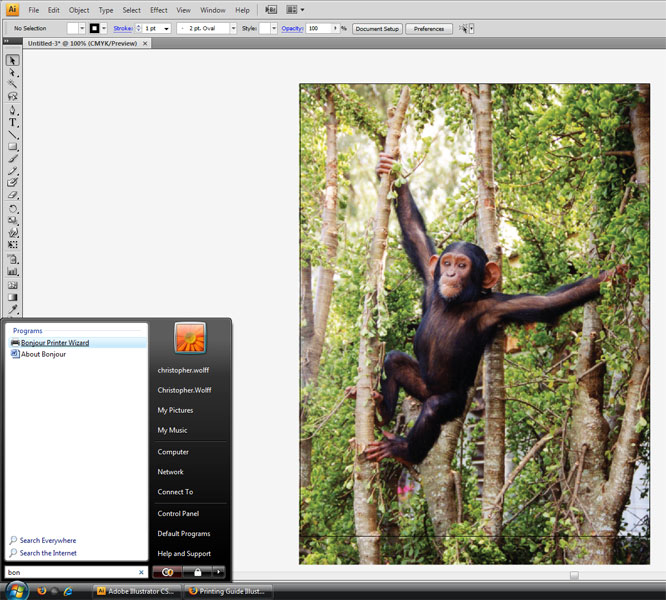
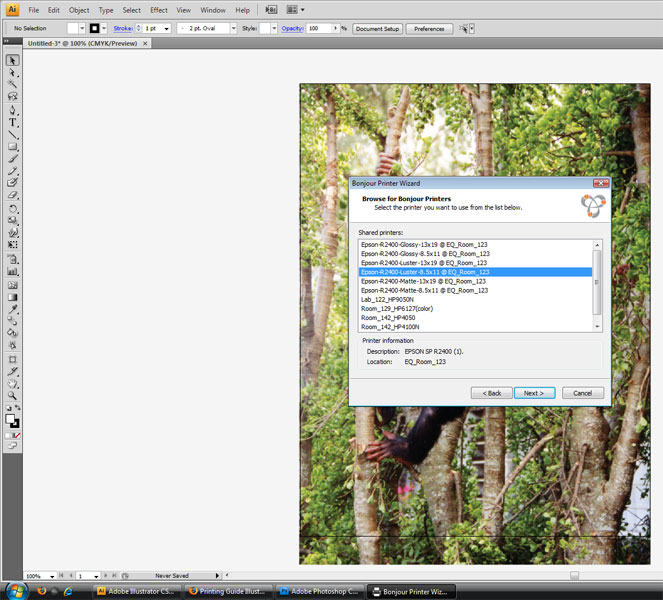
Before you can print on a PC you might have to first setup the printer in Bonjour. If the desired photo printer isn't available from the printer selection window that means you're going to first need to set up the printer in Bonjour. To open Bonjour first you must Click the Windows Icon to bring up the start menu. In the search bar type "bonjour" to bring up the Bonjour printer setup. Each printer is named based upon the size and the paper type needed for print.
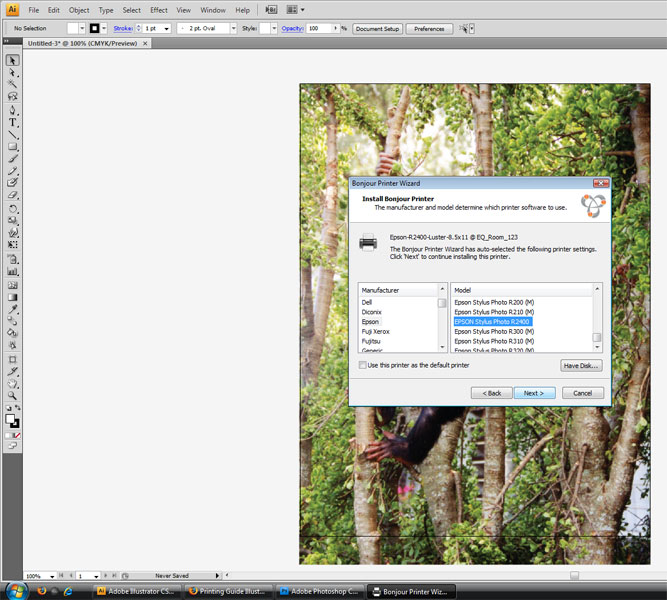
Select the printer you wish to print from and continue through the menu, making sure Epson Stylus printer is selected.
Printing In Illustrator
Step 2 - Setting Up Printer Settings in Illustrator
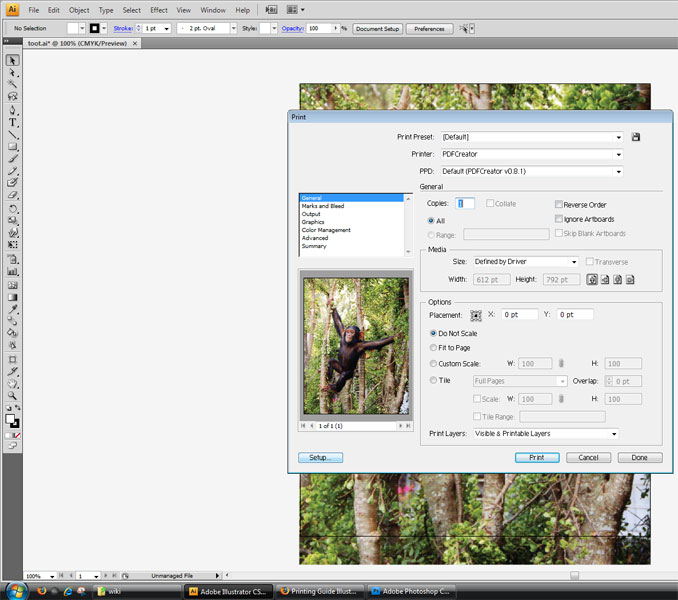
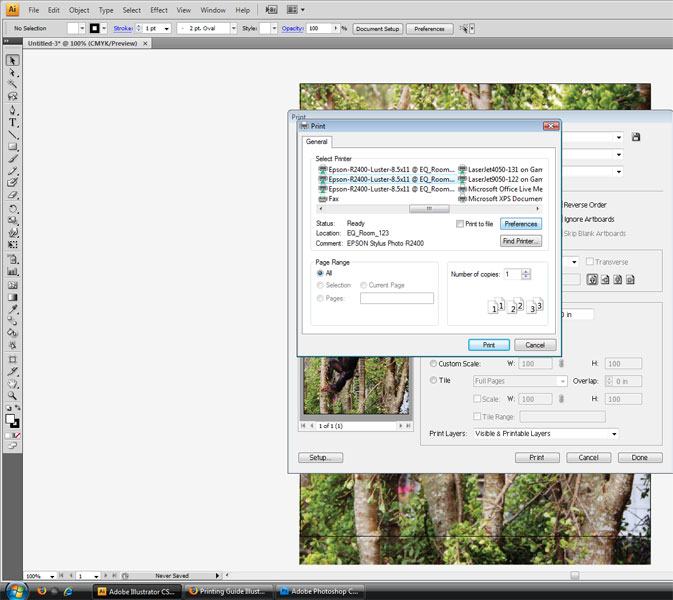
Now it's time to set up the printer in Illustrator. Go to file and select print. Once the printing window appears select the setup button.
Step 2.5 - Selecting Printer Settings
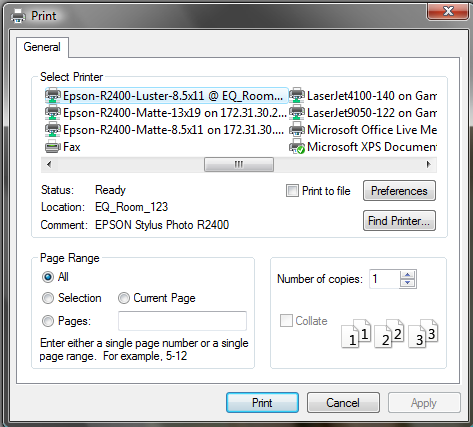
Once the printer dialogue box appears select the printer you setup in Bonjour. Then select Preferences.
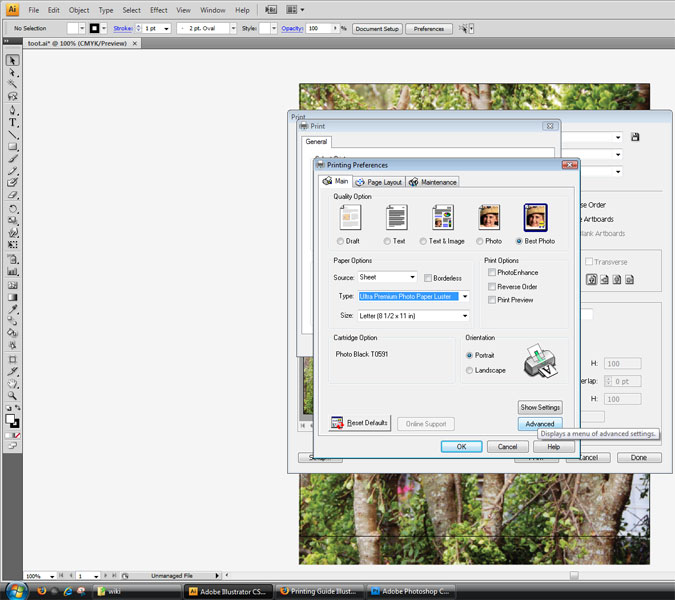
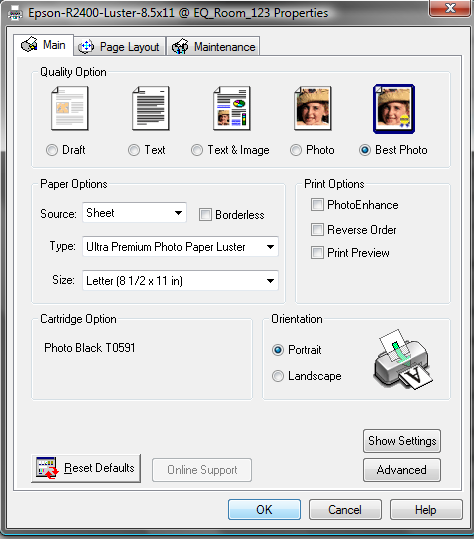
In the printing preferences window make sure the best photo icon is selected. For Source make sure "Sheet" is selected and check the Borderless checkbox if you plan to bleed your print to the edge of the print. For Type select the paper type you've specified earlier in the printer setup along with the size. Since the paper-type and size have are inherent to each printer this step has pretty much already been taken care of for you. Select Portrait or Landscape based upon how you wish the printer to select your Dimension. Once all these preferences have been set, click "Advanced" button.
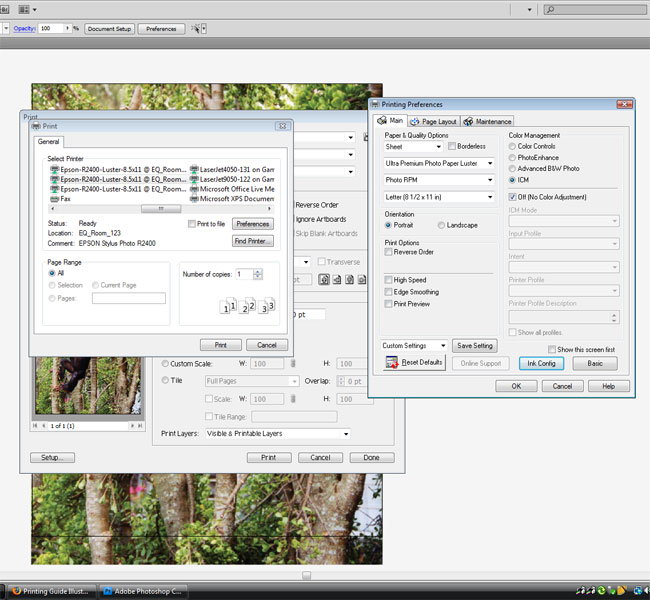
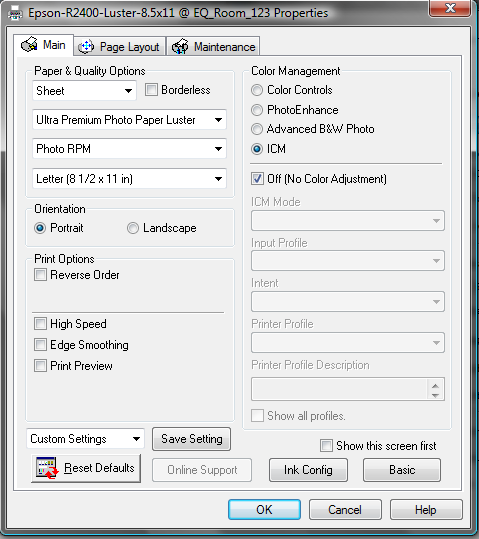
Once in the Advanced window first check the "Paper and Quality Options" and select sheet. Check the box marked "Borderless" if you wish to bleed your print to the edge of the paper without a predefined border. Below it select the paper type that your using and select "Photo RPM" from the print quality drop down menu. Also select your paper size again from the drop down menu below it. Select what "Orientation" you want and make sure the "High Speed" checkbox is turned off.
In the "Color Management" radio buttons make sure ICM is selected. Under it check the "Off[No Color Adjustmant]". When done click okay and you will be taken back to the Illustrator Print Screen.
Congrats your done, so click "print."
Printing in Photoshop
Printing in Photoshop on a PC is pretty much identical to Illustrator. Just like our PC Illustrator tutorial, if you can't find the printer from the printer selection screen you may have to set up the printer in Bonjour.
Step 1 Setting Up Printing in Photoshop
Now it's time to set up the printer in Photoshop. Go to file and select print. Once the printing window appears check to make sure to select the printer you wish to use. Make sure to select a printer with your correct paper type and size in mind. For example Epson-R2400-Matte-8.5x11@EQ_Room_123. Pay special attention to the room number, making sure to print to the equipment room 123.
Once done select the "Page Setup" button.
Select the printer you desire to print from and select "Preferences."
Step 2 Setting Printer Preferences
In the printing preferences window make sure the best photo icon is selected. For Source make sure "Sheet" is selected and check the Borderless checkbox if you plan to bleed your print to the edge of the print. For Type select the paper type you've specified earlier in the printer setup along with the size. Since the paper-type and size have are inherent to each printer this step has pretty much already been taken care of for you. Select Portrait or Landscape based upon how you wish the printer to select your Dimension. Once all these preferences have been set, click "Advanced" button.
Once in the Advanced window first check the "Paper and Quality Options" and select sheet. Check the box marked "Borderless" if you wish to bleed your print to the edge of the paper without a predefined border. Below it select the paper type that your using and select "Photo RPM" from the print quality drop down menu. Also select your paper size again from the drop down menu below it. Select what "Orientation" you want and make sure the "High Speed" checkbox is turned off.
In the "Color Management" radio buttons make sure ICM is selected. Under it check the "Off[No Color Adjustmant]". When done click okay and you will be taken back to the Photoshop Print Screen.
Step 3 Selecting Photoshop Settings
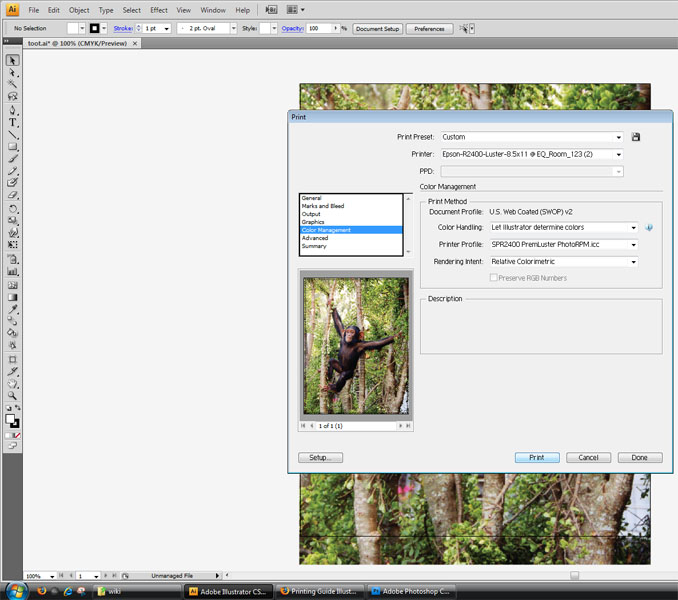
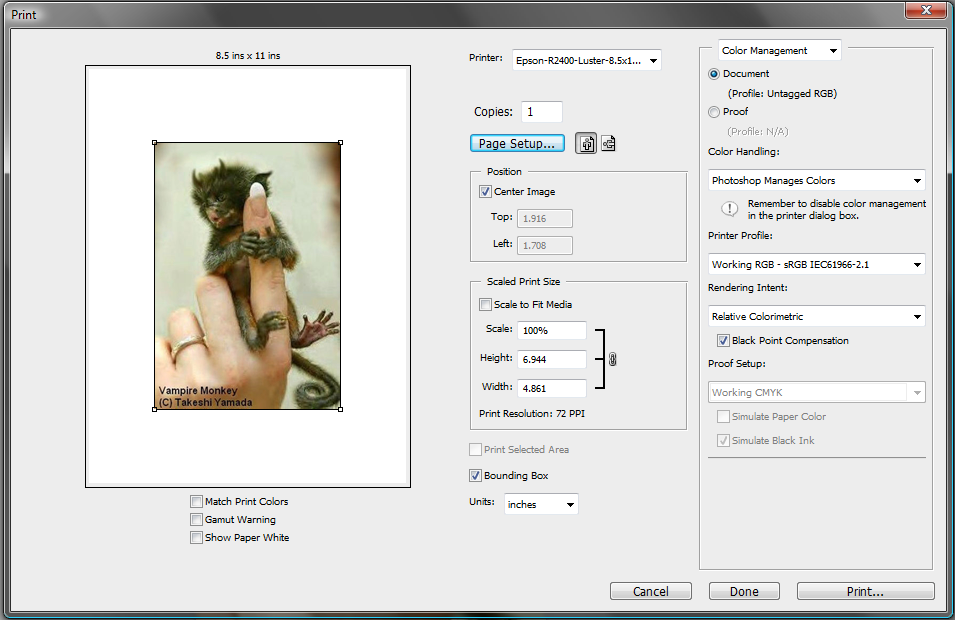
Once back in the Photoshop Print Screen make sure to check a few items. First make sure that color handling drop down has been set to "Photoshop Manages Color". Next make sure the printer Profile is set to the RGB profile used in your document. (NOTE: The default working profile is set to sRGB IEC61966-2.1 but we suggest going before hand and changing your profile to Adobe RGB 1998 under EDIT > Assign Profile.) If you've changed your profile to Adobe RGB 1998 then select it or the default working color profile. Once done click Print.
The printer setup will pop up again. Make sure you've selected the right printer yet again and that it's printing location in EQ_Room_123. If needed click preferences again and double check to make sure you've selected all of the right printer preferences correctly. Once your done click Print and enjoy the wonderful printing experience.
