Difference between revisions of "Equipment Restrictions and Clearance"
Shara.Miller (talk | contribs) |
Shara.Miller (talk | contribs) |
||
| Line 1: | Line 1: | ||
| − | + | =How to add clearance to students= | |
==Restrictions and How They Work== | ==Restrictions and How They Work== | ||
| Line 20: | Line 20: | ||
#In the Add Permissions | #In the Add Permissions | ||
#Once you find the student's name / ID and corresponding account, their current permissions are displayed. For any missing equipment permission, click on the checkbox with the permission that you need to grant. From there, click Add Permission and the student should be able to check out the appropriate equipment. | #Once you find the student's name / ID and corresponding account, their current permissions are displayed. For any missing equipment permission, click on the checkbox with the permission that you need to grant. From there, click Add Permission and the student should be able to check out the appropriate equipment. | ||
| + | |||
| + | |||
| + | [[Category:Equipment]] | ||
| + | [[Category:Tutorials]] | ||
| + | [[Category:IAMResources]] | ||
Revision as of 20:10, 8 October 2008
How to add clearance to students
Restrictions and How They Work
Each equipment category has a restriction tied to it. For instance, in order to take out any equipment under the Manual Photography category, a student would have to take Digital Image Design. However, there are categories that will be automatically cleared for a student to use. For example, the Training Software category is automatically cleared for students to check out the tutorial software.
Clearing Students For Equipment
Eventually, you will come across students who have not been cleared for certain categories of equipment. In this case, you'd want to follow these steps to clear them for checkouts.
Before you give a student any clearance, make sure to check if the student has met the requirements. If they have taken a class that is required for clearance, request that they bring you a transcript for proof.
Once you have credentials, proceed to the Equipment Database and do the following:
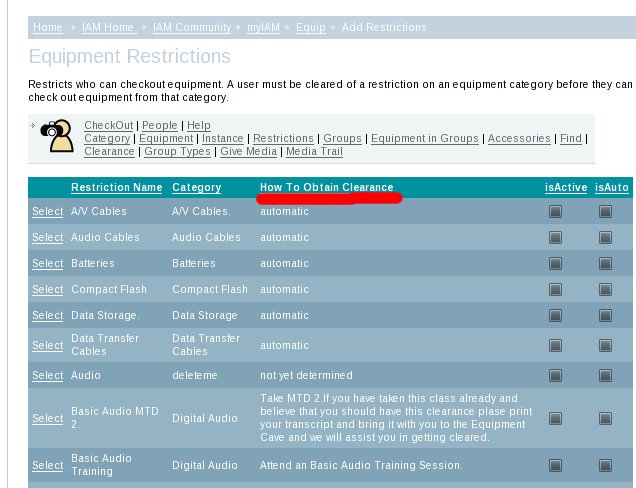
- Click on Restrictions in the navigation menu.:

- Once Restrictions have been selected, check the column labeled How To Obtain Clearance. This displays details on what requirements need to be met before a student is able to take out equipment in the corresponding Category.:
- After checking for the proper requirements, click on Clearance in the navigation:
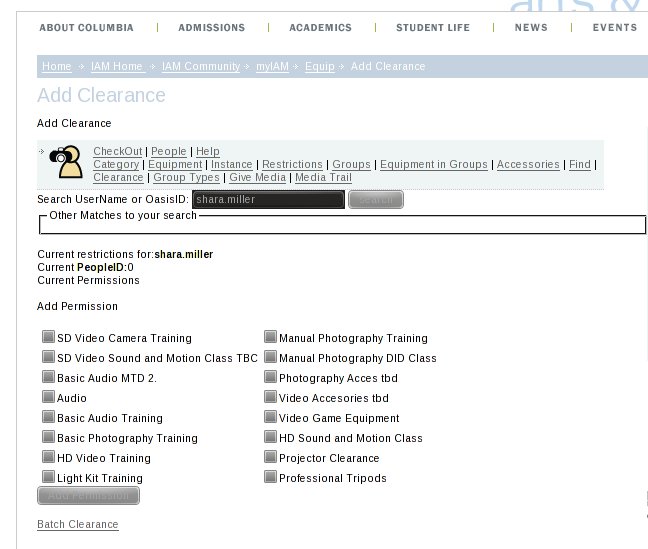
- From here, you can enter the student's name or Oasis ID number into the search bar below the navigation. Please note that some students login with Firstname.Lastname rather than FLastname (or vice versa.) If you enter a student's oasis ID, be sure to ask them if the corresponding account name is the one that they currently log in to the lab computers with.
- In the Add Permissions
- Once you find the student's name / ID and corresponding account, their current permissions are displayed. For any missing equipment permission, click on the checkbox with the permission that you need to grant. From there, click Add Permission and the student should be able to check out the appropriate equipment.


