Difference between revisions of "D200 Tutorial"
esse quam videri
(→Front and Back Views) |
|||
| Line 9: | Line 9: | ||
==Front and Back Views== | ==Front and Back Views== | ||
| − | [[Image: | + | [[Image:D200 front.png|frame|250px|left|Front view of Nikon D200 Digital Camera. ]] |
| − | [[Image: | + | [[Image:D200 back.png|frame|250px|right|Back view of Nikon D200 Digital Camera. ]] |
<br><br><br><br><br><br><br><br><br><br><br><br> | <br><br><br><br><br><br><br><br><br><br><br><br> | ||
<br><br><br><br><br><br><br><br><br><br><br><br> | <br><br><br><br><br><br><br><br><br><br><br><br> | ||
Revision as of 19:35, 30 June 2009
Overview
This is a basic tutorial on how to use the Nikon D200.
FYI: You need to be cleared in order to check out the D200.
There is also NO AUTO MODE built into the D200.
Front and Back Views
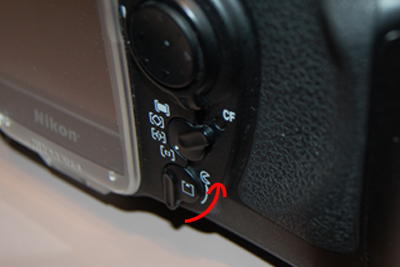
Removing the Memory Card
Step 1
Flip the CARD SLOT COVER LATCH upwards and the card cover will flip open.
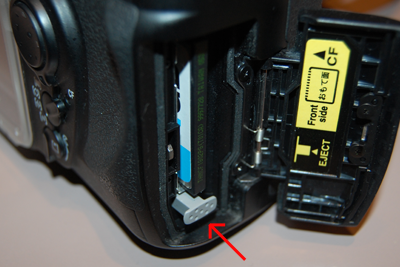
Step 2
Push the gray button inwards so pop out the memory card.
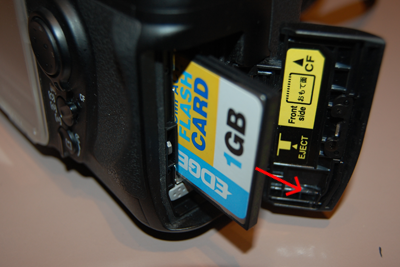
Step 3
Pull out the compact flash card.
Full Manual
If you are interested in learning more on the advanced features please refer to the owners manual located on the Nikon website.
http://www.nikonusa.com/pdf/manuals/noprint/D200_en_noprint.pdf


