Difference between revisions of "Avid Media Composer H.264 Export"
From MediaArts KB
| Line 10: | Line 10: | ||
=== Step by step H.264 exporting: === | === Step by step H.264 exporting: === | ||
| − | + | :1. Select the sequence in the bin and from the File menu select Output>Export to file... | |
[[File:1 File Output Export to File.png|frame|left|File>Output>Export to File]] | [[File:1 File Output Export to File.png|frame|left|File>Output>Export to File]] | ||
| − | + | :2. Select the drive you are exporting to. Select Export Setting "Send to QT Movie. Click Options... | |
[[File:2 Export drive and setting.png|frame|left|Export drive and setting]] | [[File:2 Export drive and setting.png|frame|left|Export drive and setting]] | ||
| + | |||
| + | :3. Select Custom, then select Format Options... | ||
| + | [[File:3 Custom Format Options.png|left|Custom Format Options]] | ||
Revision as of 19:41, 15 February 2017
Avid Media Composer v8.7.2
Problem:
When exporting H.264 files from Avid Media Composer, the progress bar appears to encode the file four times before finishing.
Solution:
Avoid using the "Best quality (Multi-Pass)" option in the Quicktime compression settings dialog box. The multi-pass export takes four times longer to do and results in a file that doesn't look any different than the one created using "Faster encode (Single-pass)".
Step by step H.264 exporting:
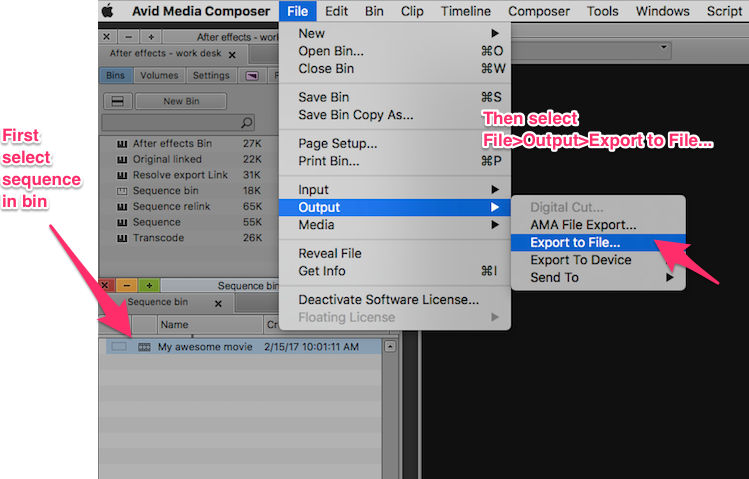
- 1. Select the sequence in the bin and from the File menu select Output>Export to file...
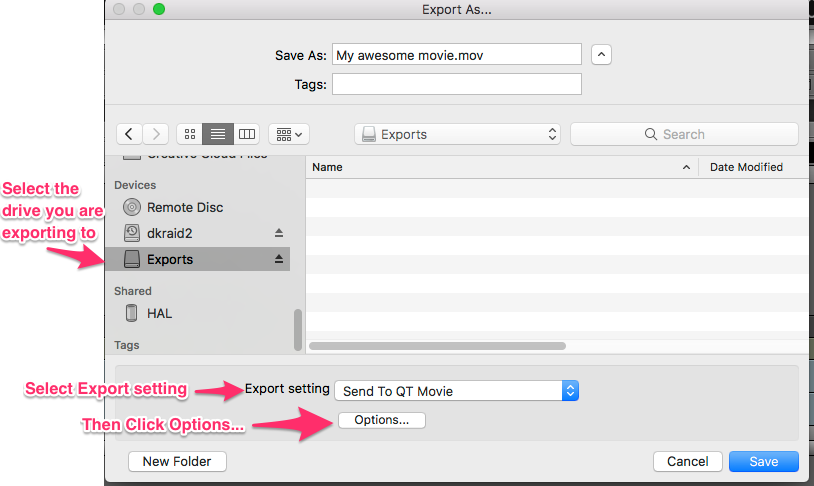
- 2. Select the drive you are exporting to. Select Export Setting "Send to QT Movie. Click Options...
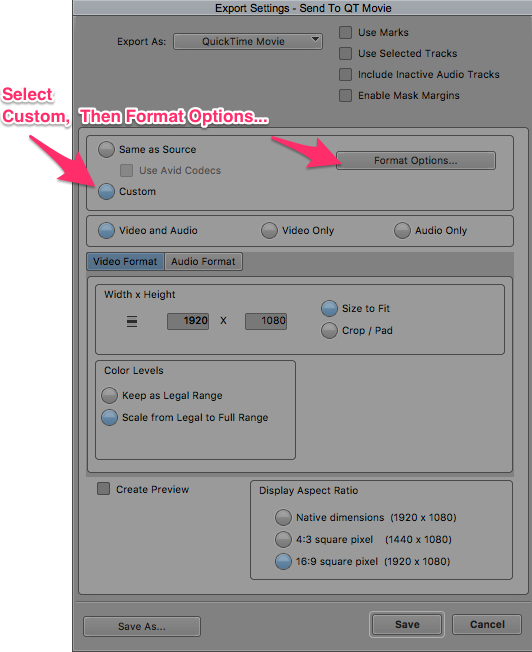
- 3. Select Custom, then select Format Options...


