Adobe Premiere Pro Project Set Up
Preparing Media for the Edit
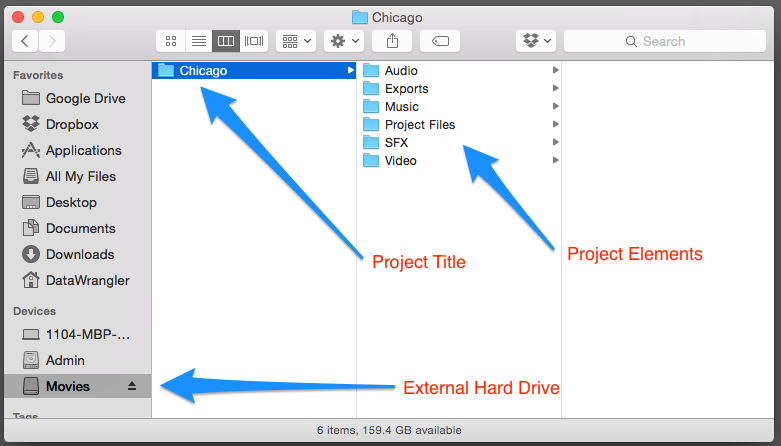
1. Create a Project Folder on your external hard drive. Inside the Project Folder create folders for the project’s elements.
For example: Audio, Video, SFX, Music, Exports, Project Files
We suggest that you create a folder for each project so all the elements for that project live in one place. By doing it this way, you can easily find any media for the project and your project will be less likely to go offline because the Project File will be tied to this folder and the media it contains.
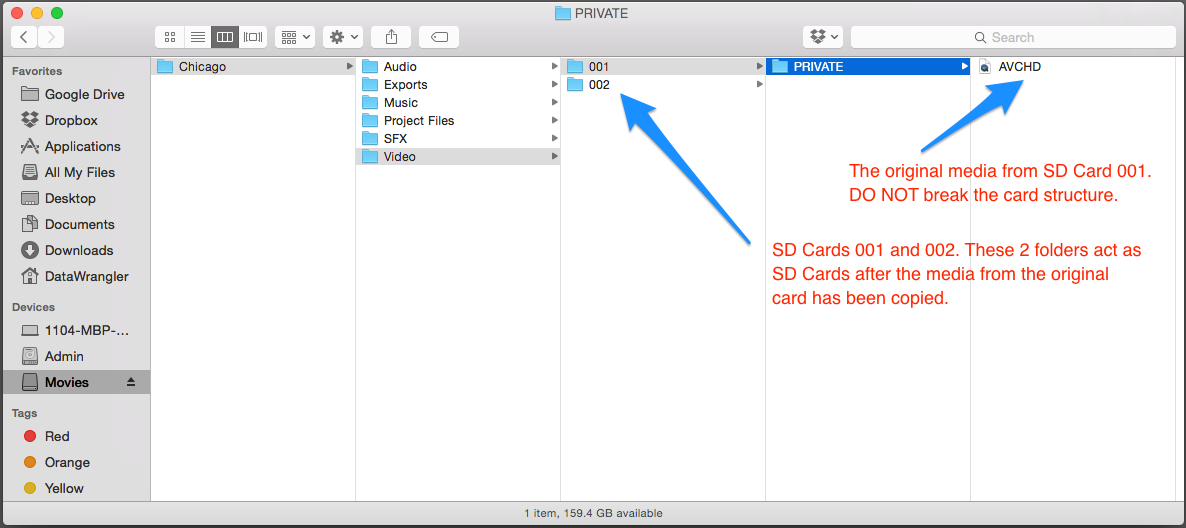
2. Media: Copy to the correct folder.
For example: I shot 2 SD cards and need to copy the media files to my Video folder. For each card, create a numbered folder: 001 and 002. Mount the first SD card and copy the contents into the 001 folder. Do the same for the second SD card. Copy everything.
Never break the card structure. This folder will act as a duplicate SD Card.
Creating a New Premiere Project
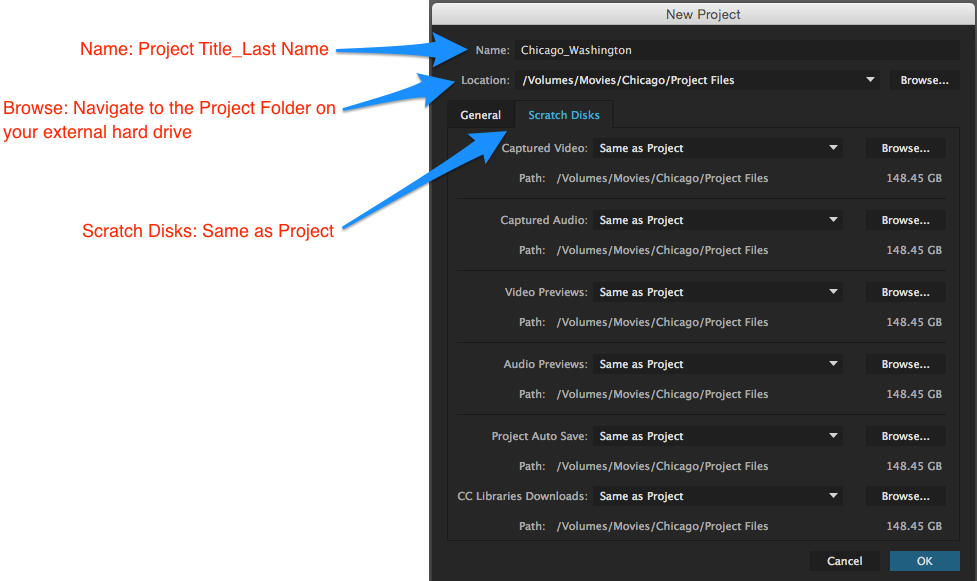
3. Launch Premiere and choose New Project.
Name: Project Title and your last name – Chicago_Washington
Location: Select Browse and navigate to the Project File folder created on your external hard drive.
Scratch Disks: Double check that everything is Same As Project and is pointed to the project folder you created.
Select OK
Once you begin editing, saving, adding effects, and rendering, a new folder – Adobe Premiere Pro Preview Files will be created along side your Project File in your Project File folder. This is a reflection of your Scratch Disk settings.
Follow this workflow for each new project.


