Difference between revisions of "Recording in Room 605"
Gary.kupczak (talk | contribs) (→Step 5 - Start Recording) |
Gary.kupczak (talk | contribs) |
||
| Line 1: | Line 1: | ||
| + | [[Image:Yamaha01V96Mixer.png|frame]] | ||
| + | |||
==Configuring the Mixer== | ==Configuring the Mixer== | ||
Revision as of 20:15, 8 October 2008
Contents
Configuring the Mixer
Step 1 - Access the Scene Memory Panel
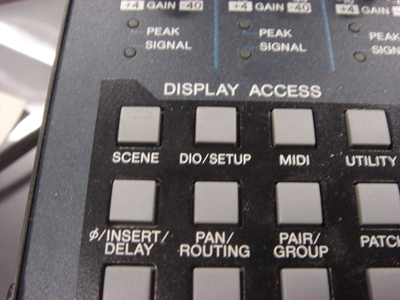
Locate the "Display Access" panel on the mixer and press the "Scene" button until the "Scene Memory" screen appears on the LCD.
Step 2 - Locate the Jefftqq Preset
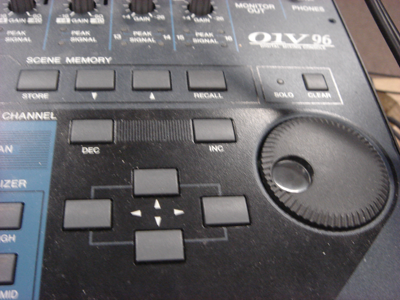
Use the scroll wheel to navigate to scene 6: "rec Jefftqq."
Step 3 - Recall the Preset
Locate the "Scene Memory" control panel and press the "Recall" button.
Preparing the Recording Booth
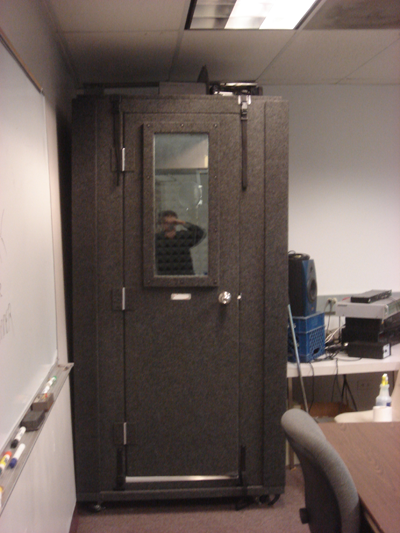
The recording booth is the black closet located directly across from the door when you enter 605.
Step 1 - Turn on Recording Booth Light
The light switch is located inside the booth, just above the door, on the right side of the light.
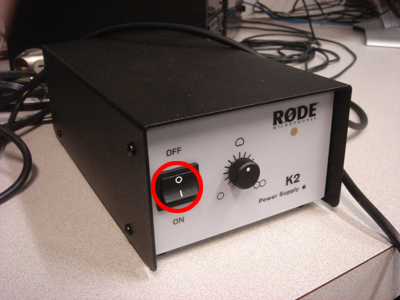
Step 2 - Turn on the Amplifier
A blue light indicates that the amplifier is turned on.
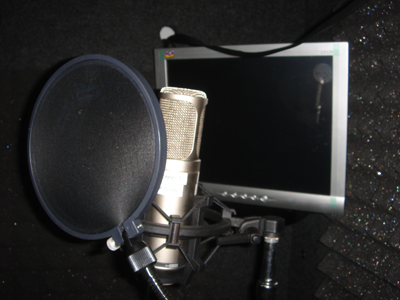
Step 3 - Adjust the Microphone
The gold dot should face the person speaking.
Make sure the pop filter is sitting in front of the microphone.
Setting up Computer Software
Yamaha Studio Manager
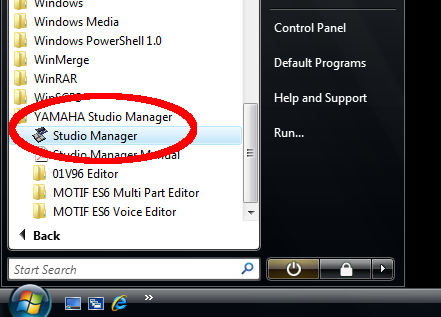
Step 1 - Start Yamaha Studio Manager
Find the Yamaha Studio Manager folder in the Start Menu, open it, and click on the Studio Manager shortcut.
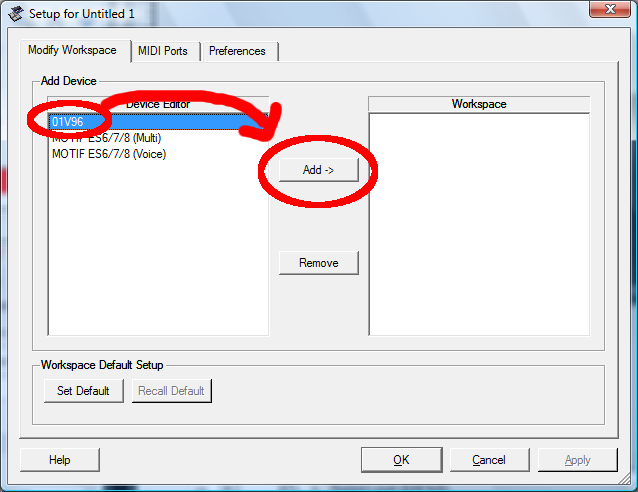
Step 2 - Prepare a New Session
Under the Device Editor column, highlight 01V96 and click Add.
Step 3 - Configure MIDI Ports
Click on the MIDI Ports tab. Under the Input Ports column, check Yamaha 01V96-1. Check the same item under the Output Ports column.
Click OK when you are finished.
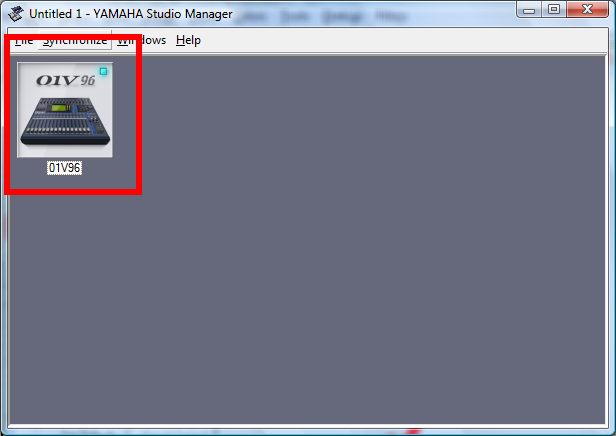
Step 4 - Select Device
A new window will appear containing a picture of the Yahama 01V96 Mixer. Double-click on the picture.
Step 5 - Configure the Session
You should see a window resembling the physical mixer sitting on the desk.
Open the File Menu and click on System Setup...
Under the box labeled Input port, select Yamaha 01V96-1.
Under the box labeled Output port, select Yamaha 01V96-1.
You must make a selection for both boxes, or the next step will fail.
Step 6 - Synchronize the Mixer
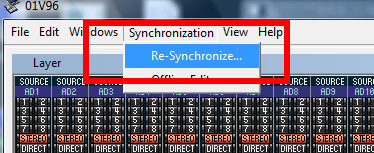
Open the Synchronization Menu and click on Re-Synchronize...
Make sure that All Libs is checked and that Direction is set to Console -> PC, and hit OK.
You can now control the mixer from the computer.
MOTU
MOTU PCI Audio Console
Step 1 - Open the MOTU PCI Audio Console
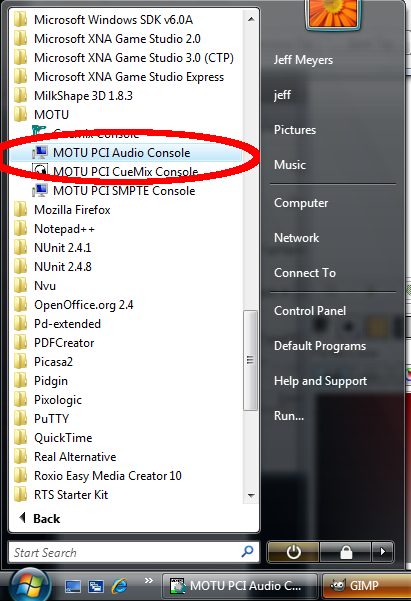
Find the MOTU folder in the Start Menu, open it, and click on the MOTU PCI Audio Console shortcut.
Step 2 - Configure the MOTU PCI Audio Console
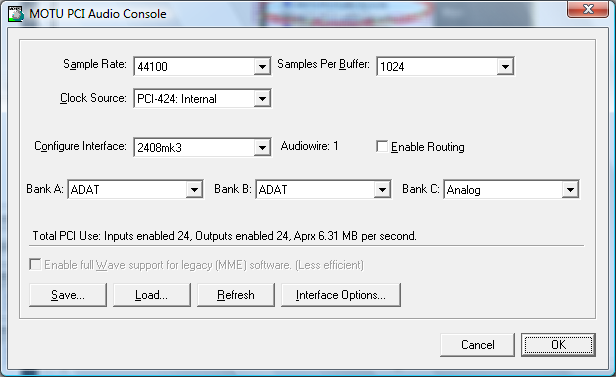
Make sure the settings look like the picture at the right.
Most importantly, make sure that Banks A and B are set to ADAT, and Bank C is set to Analog.
MOTU PCI CueMix Console
Step 1 - Open the MOTU PCI CueMix Console
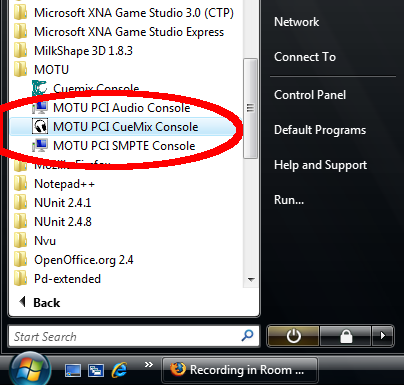
Find the MOTU folder in the Start Menu, open it, and click on the MOTU PCI CueMix Console shortcut.
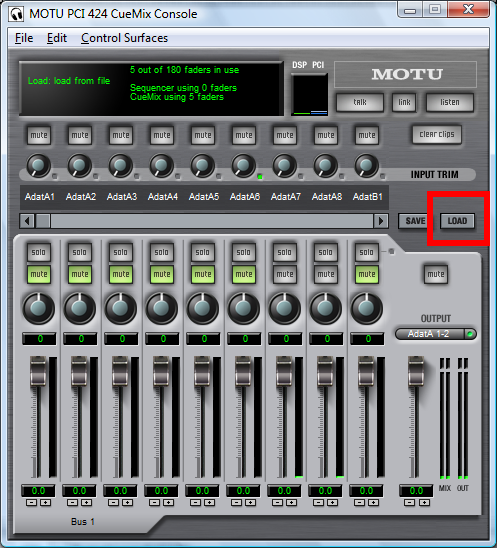
Step 2 - Load the MOTU CueMix Room 605 Preset
Click the Load button on the right side of the window.
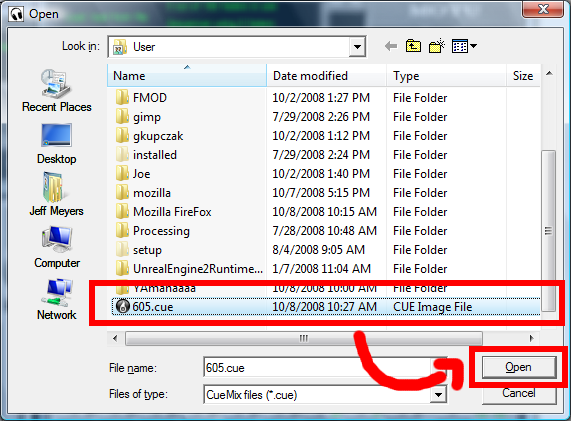
Navigate to C:\User and load the 605.cue file.
The MOTU 2408mk3 is now configured and fully operational.
Sound Forge
Step 1 - Open Sound Forge
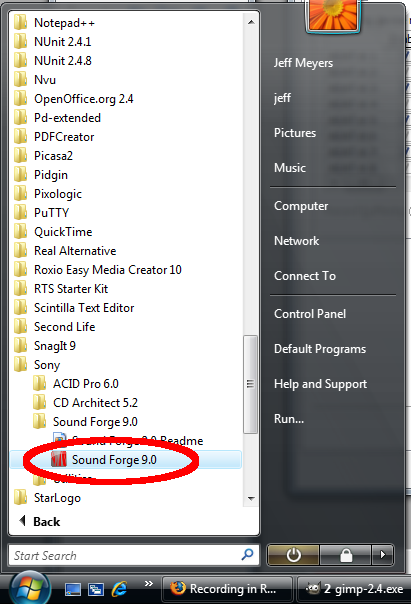
Open the Start Menu and locate the Sony folder. Open the Sound Forge 9.0 folder and click on the Sound Forge 9.0 shortcut to open Sound Forge.
Step 2 - Select the Audio Device
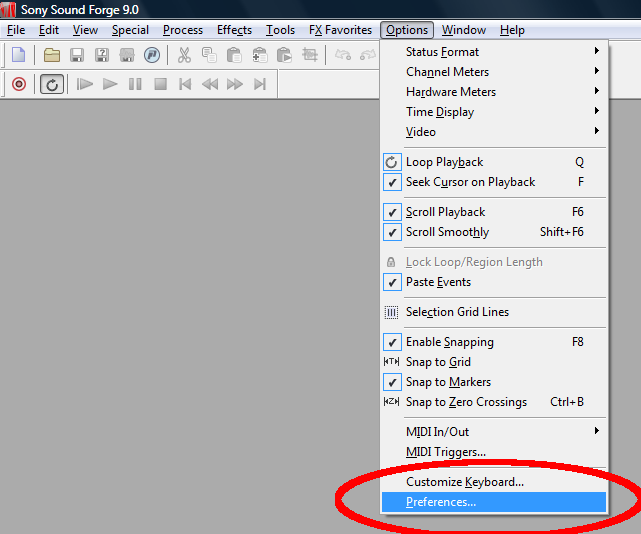
Open the Options Menu and click on Preferences... at the very bottom of the list.
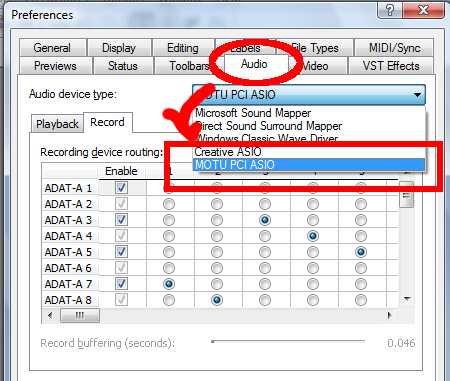
Locate the Audio tab and using the drop-down menu, change the Audio device type to MOTU PCI ASIO.
Step 3 - Configure the Audio Device
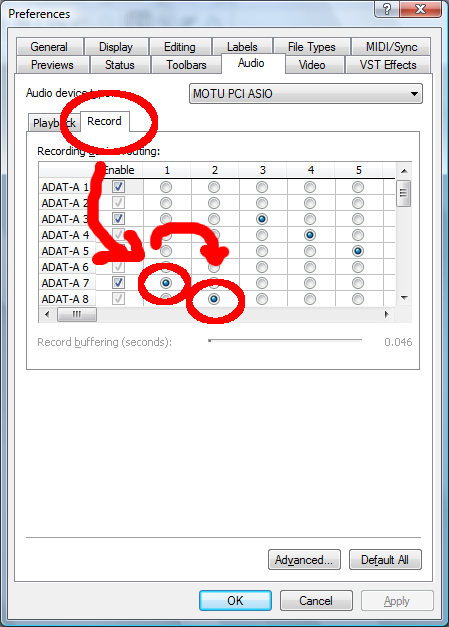
Click the Record tab.
Under the column labeled 1, click the circle in the row labeled ADAT-A 7.
Under the column labeled 2, click the circle in the row labeled ADAT-A 8.
Sound Forge is now properly configured for recording.
Adjusting the Headphones Volume
The headphone amplifier controls the volume of the headphones in the booth. Additional headphones can be connected to the amplifier so that other people may listen.
To adjust the volume of the headphones in the booth, use the knob labeled channel 1.
Recording
Step 1 - Open Sound Forge
Open the Start Menu and locate the Sony folder. Open the Sound Forge 9.0 folder and click on the Sound Forge 9.0 shortcut to open Sound Forge.
Step 2 - Create a New File
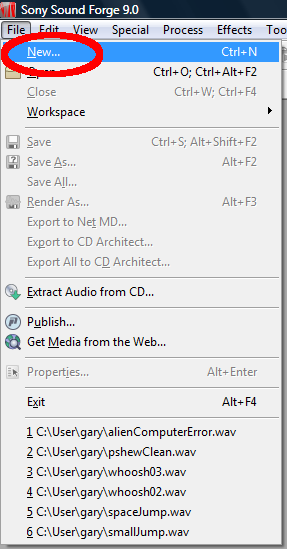
Open the File Menu and click New...
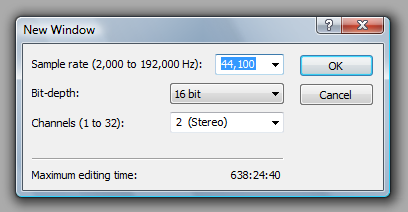
Set the Sample Rate to 44,100.
Set the Bit Depth to 16.
Set the Channels to 2 (Stereo).
Step 3 - Open the Record Window
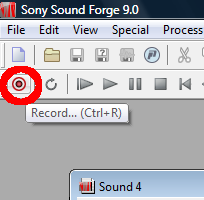
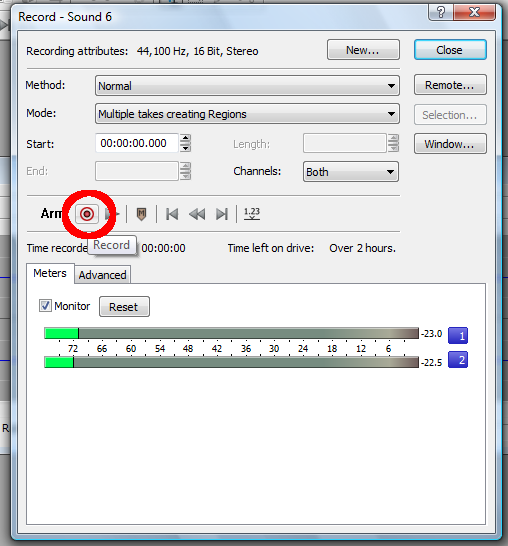
Click on the red Record button in the tool bar, or press Ctrl+R.
Step 4 - Configure the Inputs
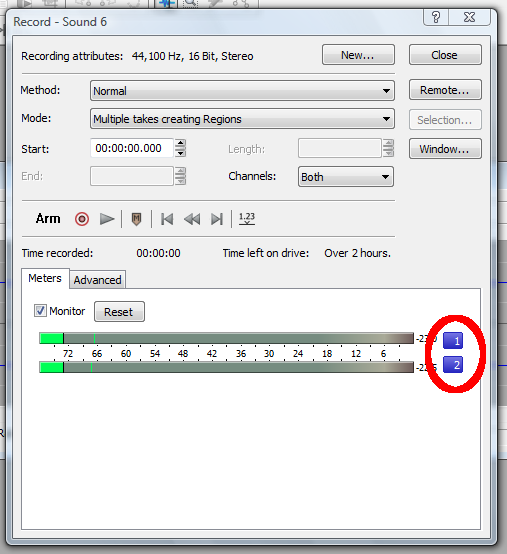
Locate the blue boxes labeled 1 and 2 to the right of your meters.
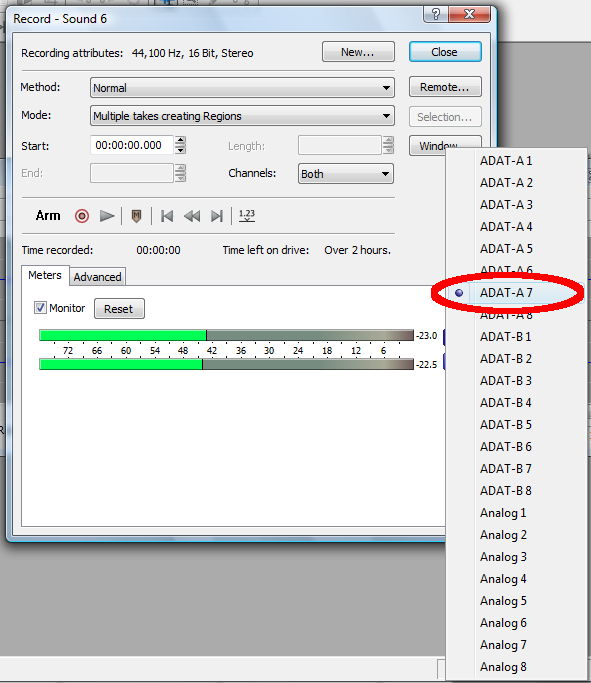
Click the box labeled 1 and select ADAT-A 7 from the list.
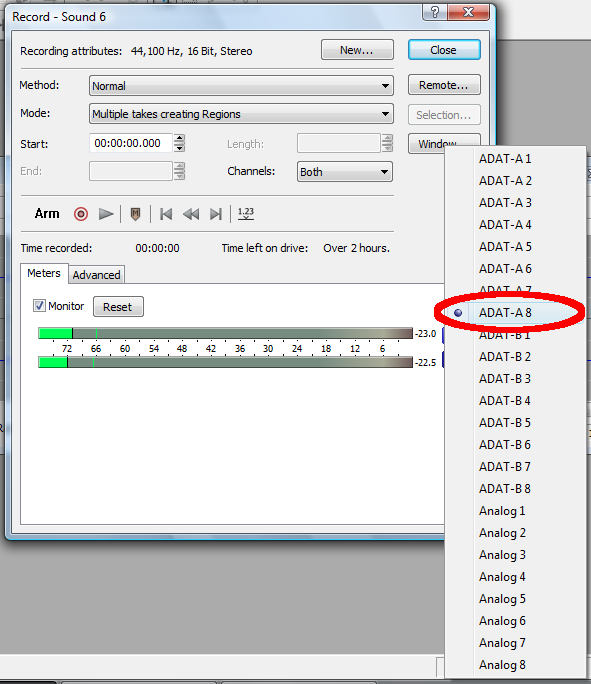
Click the box labeled 2 and select ADAT-A 8 from the list.
Step 5 - Start Recording
Click the red Record button to begin recording.
When you are finished recording, press the Stop button, and click Close.
Be sure to save your work by selecting Save from the File Menu or by pressing Ctrl+S!
For additional information on saving, please consult the Good Saving Practices tutorial.

