Professional Tripod Tutorial
This is a heavy tripod, suitable for professional applications. It is available with a photo or video head. When used with the video head, it is ideal for smooth tilt and pan operations.
Contents
Overview
| Professional Tripod Kit | [[Image:]] | [[Image:]] | [[Image:]] | [[Image:]] |
| Tripod Base | Tripod Head | Tripod Quick Mount | Tripod Bag |
This tutorial covers the basic operation of the SLIK The Professional 4 tripod and Manfrotto video and photo tripod heads.
Using the Video Head
Attaching the Camera
Step 1 - Remove the Mounting Plate
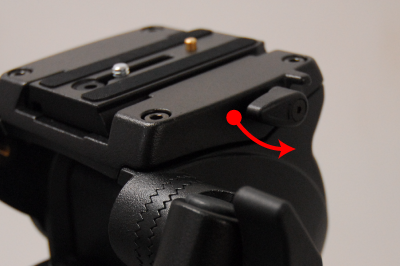
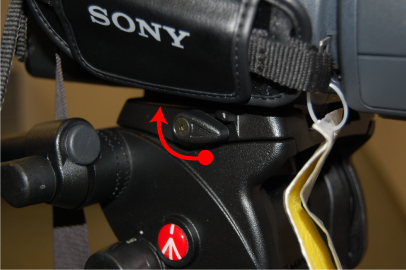
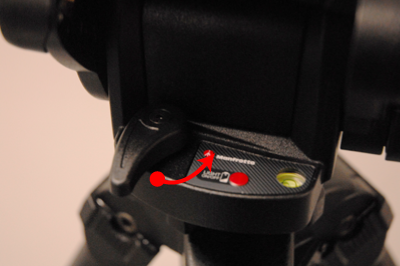
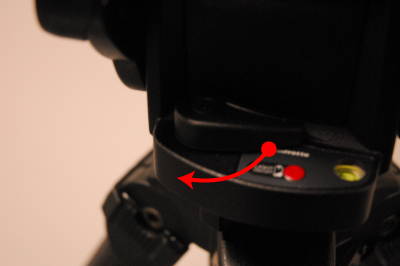
To remove the mounting plate, first loosen it by pushing the black lever all the way down.
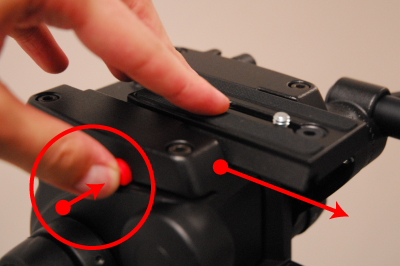
Then, hold down the red button and slide the plate out.
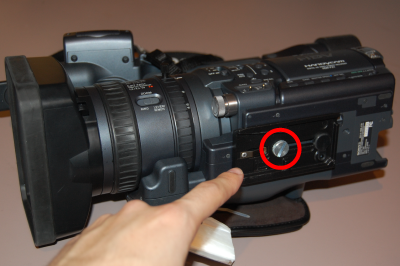
Step 2 - Attaching the Plate to the Camera
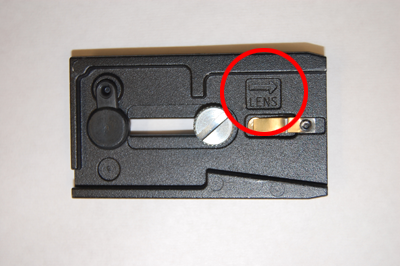
On the bottom of the plate is an arrow labeled lens. Make sure the arrow is pointing towards the front of the camera.
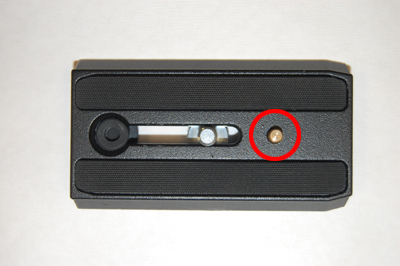
Locate the gold peg on the top of the mounting plate. This peg fits into the small hole on the bottom of the camera.
Once the peg is set, line the screw up with the large, threaded hole and tighten it using a screwdriver or coin.
Do not over-tighten it but make sure it is secure enough that the camera does not wiggle around on the mounting plate.
Step 3 - Reattaching the Mounted Camera to the Tripod
Hold down the red button and slide the mounting plate back into place.
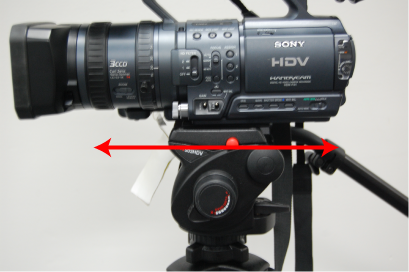
At this point, you can move the camera forward and backwards so that it balances properly.
Once it is properly seated, flip the black lever all the way up to secure the mounting plate in place.
Adjusting the Handle
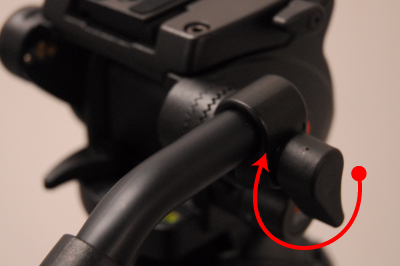
To adjust the position of the handle, simply loosen the handle knob until it can be moved freely.
Once it is in a comfortable position, tighten the knob to lock the handle in place.
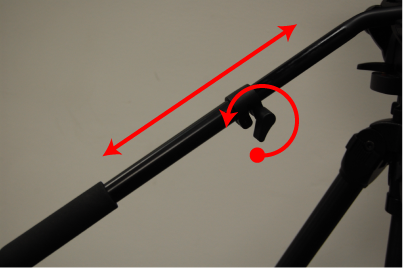
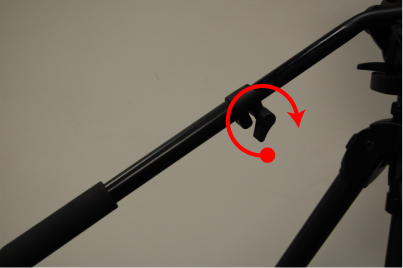
To make the handle longer, loosen the length knob located partway down the handle and adjust it as desired.
Tighten it to lock the length of the handle.
Be aware that the telescopic part of the handle is lubricated. When the handle is extended beyond its normal length only move it using the textured grip.
This will keep your hands clean and ensure that the part stays lubricated.
Using the Level
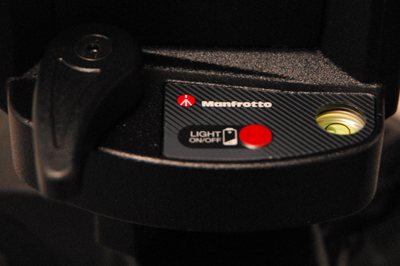
The video head has a level built into it, located near the pan clutch. When the bubble is in the center of the black circle, the tripod is sitting level.
Pushing the red button labeled "Light ON/OFF" will briefly turn on the level's backlight, allowing it to be seen in dark environments. If left on, the light will automatically turn itself off to conserve battery power.
Adjusting the Center Column
The center column can be adjusted to fine tune the height of the camera.
Step 1 - Unlocking
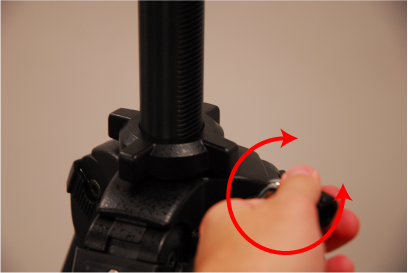
First, release the center column lock by twisting the knob counter-clockwise.
Step 2 - Securing the Handle
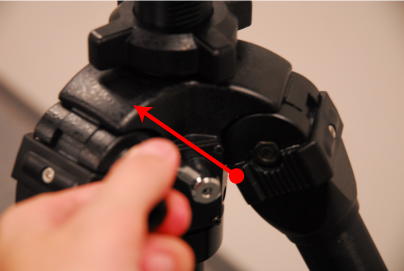
Pull the handle up until it locks into place.
Step 3 - Adjust the Height
Rotate the handle until the camera is at the desired height.
Tilting
Step 1 - Unlocking
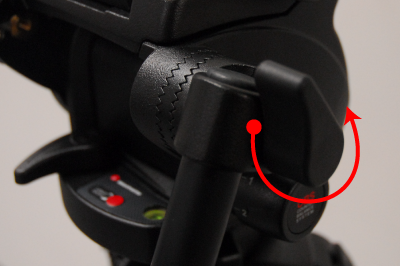
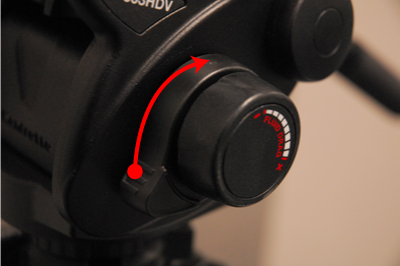
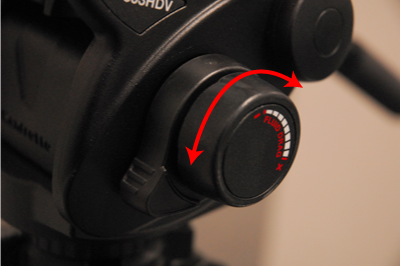
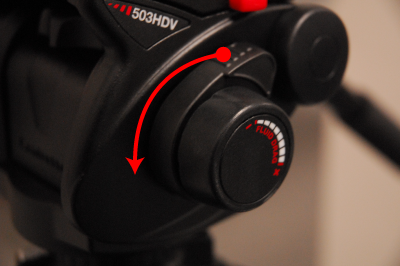
To tilt, release the tilt locking knob by rotating it upwards.
Step 2 - Adjusting the Resistance
Use the adjacent fluid-drag knob to adjust the resistance. More drag means more resistance.
Step 3 - Locking
Rotate the tilt locking knob downwards to lock your tilt.
Panning
Step 1 - Unlocking
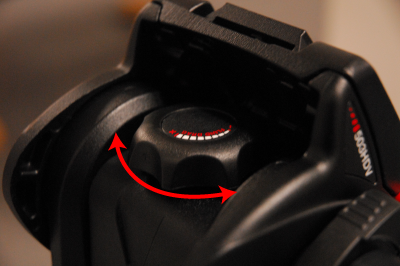
To pan, release the pan locking knob by rotating it inward.
Step 2 - Adjusting the Resistance
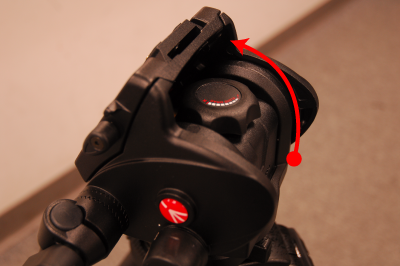
To adjust the resistance, release the tilt locking knob and tilt the head all the way up.
The exposed fluid-drag knob controls pan resistance. More drag means more resistance.
Step 3 - Locking
Rotate the pan locking knob outwards to lock your pan.
"What if the head becomes loose?"
If you notice that the you can pan while the pan lock is engaged, it is possible the head has come loose.
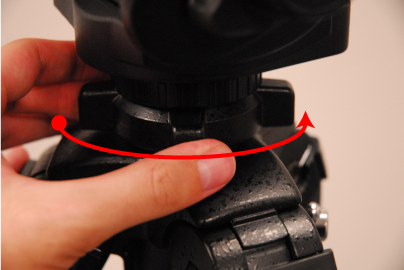
If this is the case, simply lock the pan knob and rotate the head counter-clockwise until it is tightened again.
