Difference between revisions of "Managing Equipment Restrictions and Clearance"
Gary.kupczak (talk | contribs) (→Step 5) |
Gary.kupczak (talk | contribs) (→Step 5) |
||
| Line 28: | Line 28: | ||
===Step 5=== | ===Step 5=== | ||
| − | In the Add Permissions section you should see a list and a series of checkboxes. The list contains all of the clearances the student currently has, while the checkboxes correspond to the ones they don't. | + | In the ''Add Permissions'' section you should see a list and a series of checkboxes. The list contains all of the clearances the student currently has, while the checkboxes correspond to the ones they don't. |
===Step 6=== | ===Step 6=== | ||
Revision as of 15:40, 17 February 2009
Contents
Restrictions and How They Work
Each equipment category has a restriction tied to it. In order to check out equipment from a particular category, a student needs to have the corresponding clearance. For example, in order to rent equipment from the Photo (Intermediate) category, a student needs the Photo (Intermediate) clearance, obtained by taking Digital Image Design. Information on categories and their restrictions can be found on the Equipment Restrictions and Clearance page.
Clearing Students for Equipment
Normally students are automatically granted clearance necessary for any classes they are taking at the beginning of the semester. Eventually, you will come across students who need to be manually cleared for certain categories of equipment.
Before you grant a student any clearance, check that they have met the requirements for it by requesting they bring you a copy of their transcript. Students can be granted clearance if they have taken or are currently taken the appropriate class as listed on the Equipment Restrictions and Clearance page.
Once you have verified their credentials, proceed to the Equipment application on the IAM site and follow these directions:
Step 1
In the navigation menu, click on Restrictions.
:
Step 2
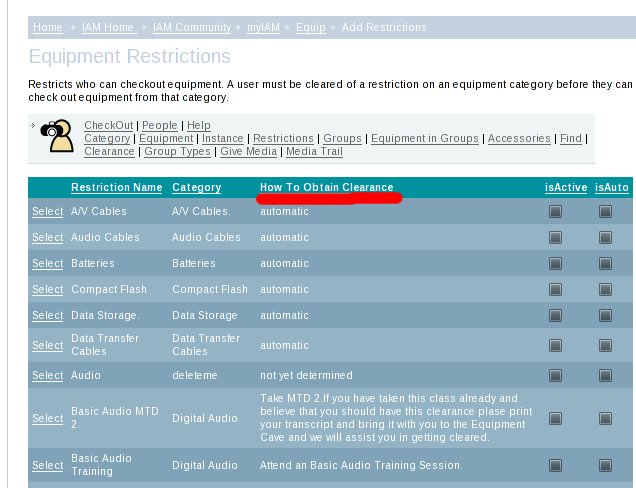
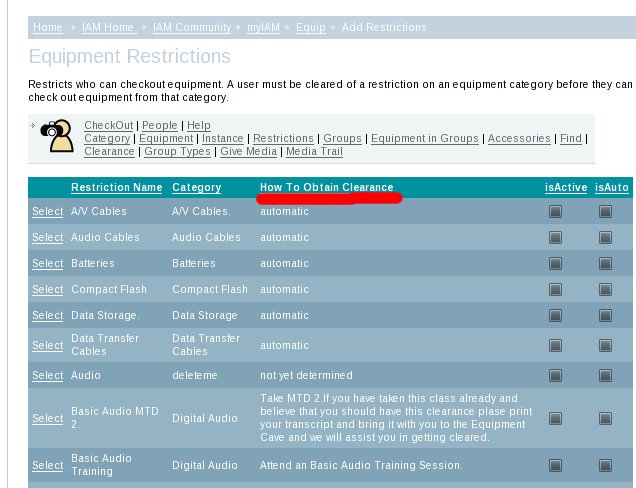
The Restrictions page lists the restrictions for each category, and the requirements that need to be met before a student can obtain the corresponding clearance.
Before you grant a student clearance, check the column labeled How To Obtain Clearance and verify that they meet the requirements.
:
Step 3
After you have verified that they meet the requirements, click on Clearance in the navigation menu.
Step 4
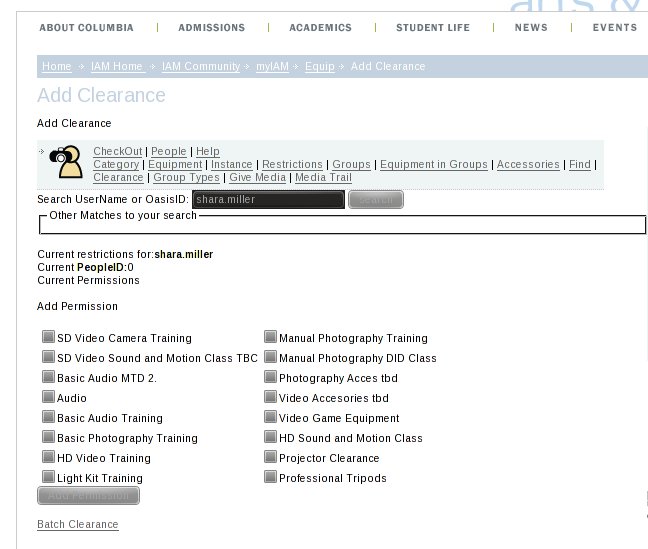
In the search box, enter the student's login name or Oasis ID number and click search.
If you search by Oasis ID: please note that the login name associated with the ID may not be the one the student actually logs in with, so be sure to verify this with the student.
In order to work, clearances must be changed on the name the student logs into the Equipment app with.
:
Step 5
In the Add Permissions section you should see a list and a series of checkboxes. The list contains all of the clearances the student currently has, while the checkboxes correspond to the ones they don't.
Step 6
Once you find the student's name / ID and corresponding account, their current permissions are displayed. For any missing equipment permission, click on the checkbox with the permission that you need to grant. From there, click Add Permission and the student should be able to check out the appropriate equipment.