Difference between revisions of "External Buffalo 320 GB HD Drive Kit"
esse quam videri
(→What's in the kit?) |
|||
| (One intermediate revision by one other user not shown) | |||
| Line 1: | Line 1: | ||
| + | [[Category:Equipment]] | ||
==Equipment Name== | ==Equipment Name== | ||
The Buffalo 320 GB Hard Drive Kit allows the user to transport large amounts of data easily between computers, or during travel. | The Buffalo 320 GB Hard Drive Kit allows the user to transport large amounts of data easily between computers, or during travel. | ||
==What's in the kit?== | ==What's in the kit?== | ||
| + | |||
| + | |||
{| border="1" cellpadding="2" style="text-align:center;" | {| border="1" cellpadding="2" style="text-align:center;" | ||
|- | |- | ||
Latest revision as of 17:38, 7 November 2012
Equipment Name
The Buffalo 320 GB Hard Drive Kit allows the user to transport large amounts of data easily between computers, or during travel.
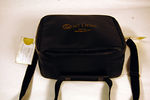
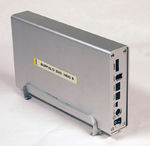
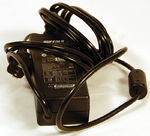
What's in the kit?

|

|

|
| Bag *Style may vary | Hard Drive | Power Cable |
Using the Drive
- Hook Up the drive to the wall using the power cable, and to your computer via USB.
- Upon plugging in the drive and turning it on, the drive will install drivers on your computer.
- After the drivers have installed, the drive will appear on your computer. (Desktop on Mac, My Computer on PC)
- The drive is now ready to use!
Formatting the Drive
After you are finished using the drive, you must format it for the next user.
- Right click on the drive and select "Format."
- Follow the steps shown on your screen to format the drive.