Difference between revisions of "Basic Android"
(→Activities) |
(→In Class Demo) |
||
| (39 intermediate revisions by the same user not shown) | |||
| Line 5: | Line 5: | ||
=Android Basics= | =Android Basics= | ||
| − | |||
| − | *App Inventor Pretty basic web interface an blocks editor to build simple android apps http://appinventor. | + | *Install 32 or 64 bit Java JDK http://www.oracle.com/technetwork/java/javase/downloads/jdk7-downloads-1880260.html |
| − | **Setup App Inventor http://appinventor. | + | |
| + | *App Inventor Pretty basic web interface an blocks editor to build simple android apps http://appinventor.mit.edu/about/ | ||
| + | **Setup App Inventor http://appinventor.mit.edu/ | ||
*Android SDK | *Android SDK | ||
**http://developer.android.com/sdk/index.html | **http://developer.android.com/sdk/index.html | ||
| − | ** | + | **Download Android Studio |
| − | ** | + | **For SDK path we will use c:\user\Android |
| − | |||
*Android NDK | *Android NDK | ||
| Line 21: | Line 21: | ||
==Basics== | ==Basics== | ||
| − | *src folder | + | |
| + | *src folder containing all the source | ||
*res folder containing all the resources | *res folder containing all the resources | ||
| + | |||
| + | folder hierarchy explained http://developer.android.com/tools/projects/index.html | ||
| + | |||
| + | First app demo http://developer.android.com/training/basics/firstapp/running-app.html | ||
| + | |||
| + | App lifecycle http://developer.android.com/guide/components/activities.html | ||
| + | |||
| + | http://developer.android.com/images/activity_lifecycle.png | ||
==Resources== | ==Resources== | ||
| Line 35: | Line 44: | ||
Get an instance of an object from the R class | Get an instance of an object from the R class | ||
| − | notice the cast to the type | + | |
| − | <java> | + | <syntaxhighlight lang="java">/** Called when the activity is first created. */ |
| − | </ | + | @Override |
| + | public void onCreate(Bundle savedInstanceState) { | ||
| + | super.onCreate(savedInstanceState); | ||
| + | setContentView(R.layout.main); | ||
| + | |||
| + | //Get the Button and the TextView from the Resource class | ||
| + | Button btn = (Button)this.findViewById(R.id.button1); //needs import android.widget.Button; | ||
| + | |||
| + | //Final in java can only be initialized once this is necessary to for use in inner method | ||
| + | final TextView tv = (TextView)this.findViewById(R.id.textView1); //needs import android.widget.TextView; | ||
| + | String s = "hello"; | ||
| + | tv.setText(s); | ||
| + | } | ||
| + | </syntaxhighlight> | ||
| + | notice the cast to the type also notice that the TextView is marked as [http://en.wikipedia.org/wiki/Final_%28Java%29 final] | ||
| + | this is so that we can use it in an inner method | ||
| + | |||
| + | handle a click event | ||
| + | <syntaxhighlight lang="java"> | ||
| + | btn.setOnClickListener(new View.OnClickListener() { | ||
| + | |||
| + | @Override | ||
| + | public void onClick(View v) { | ||
| + | // TODO Auto-generated method stub | ||
| + | tv.setText(d.About()); | ||
| + | } | ||
| + | });</syntaxhighlight> | ||
| + | |||
| + | We can also do this without the inner method by declaring a click method in the class | ||
| + | <syntaxhighlight lang="java"> | ||
| + | public void buttonPressMe_OnCLick(View v) | ||
| + | { | ||
| + | TextView tv = (TextView)this.findViewById(R.id.textView2); | ||
| + | tv.setText("Hello From Button!!"); | ||
| + | } | ||
| + | </syntaxhighlight> | ||
| + | Then we can set the click handler in the layout xml in out case acivity_main.xml | ||
| + | <syntaxhighlight lang="xml"> | ||
| + | <Button | ||
| + | android:text="Press Me" | ||
| + | android:layout_width="wrap_content" | ||
| + | android:layout_height="wrap_content" | ||
| + | android:layout_below="@+id/textView" | ||
| + | android:layout_alignParentLeft="true" | ||
| + | android:layout_alignParentStart="true" | ||
| + | android:layout_marginLeft="13dp" | ||
| + | android:layout_marginStart="13dp" | ||
| + | android:layout_marginTop="24dp" | ||
| + | android:id="@+id/buttonPressMe" | ||
| + | android:onClick="buttonPressMe_OnCLick (MainActivity)" /> | ||
| + | </syntaxhighlight> | ||
==Events== | ==Events== | ||
| Line 44: | Line 103: | ||
| + | ==AVD== | ||
| + | |||
| + | ==Dog Class in java== | ||
| + | <syntaxhighlight lang="java"> | ||
| + | public class Dog { | ||
| + | public String Name; //Java uses capital S String | ||
| + | public int Weight; | ||
| + | public String BarkSound; | ||
| + | |||
| + | //Constructor | ||
| + | public Dog() | ||
| + | { | ||
| + | this.Name = "fido"; | ||
| + | this.Weight = 1; | ||
| + | this.BarkSound = "woof"; | ||
| + | } | ||
| + | |||
| + | public void Eat() | ||
| + | { | ||
| + | this.Weight++; | ||
| + | } | ||
| + | public void Poop() | ||
| + | { | ||
| + | this.Weight--; | ||
| + | } | ||
| + | |||
| + | public String About() | ||
| + | { | ||
| + | //Java string.format is similar to c# but used %s for string substitution | ||
| + | return String.format("Hello my name is %s. I weigh %s lbs", | ||
| + | this.Name, this.Weight); | ||
| + | } | ||
| + | } | ||
| + | </syntaxhighlight> | ||
| + | |||
| + | =In Class Demo= | ||
| + | *Get and install Android Studio this demo uses 2.2 https://developer.android.com/sdk/installing/studio.html | ||
| + | *Start Android Studio | ||
| + | *Select Configure | ||
| + | [[File:AndroidStudioConfigure.png]] | ||
| + | *Select Android SDK Manager | ||
| + | [[File:AndroidStudioSDKManager.png]] | ||
| + | *Make sure you have a current SDK for this Demo we will use 24 | ||
| + | [[File:AndroidSDKManagerCurrentVersion.PNG|Alt]] | ||
| + | *Go back to the main menu and select New Project | ||
| + | [[File:AndroidStudioNewProject.PNG|Alt]] | ||
| + | *Name the Project OOPDog and select Next | ||
| + | [[File:AnroidStudioConfigureNewProject.PNG|Alt]] | ||
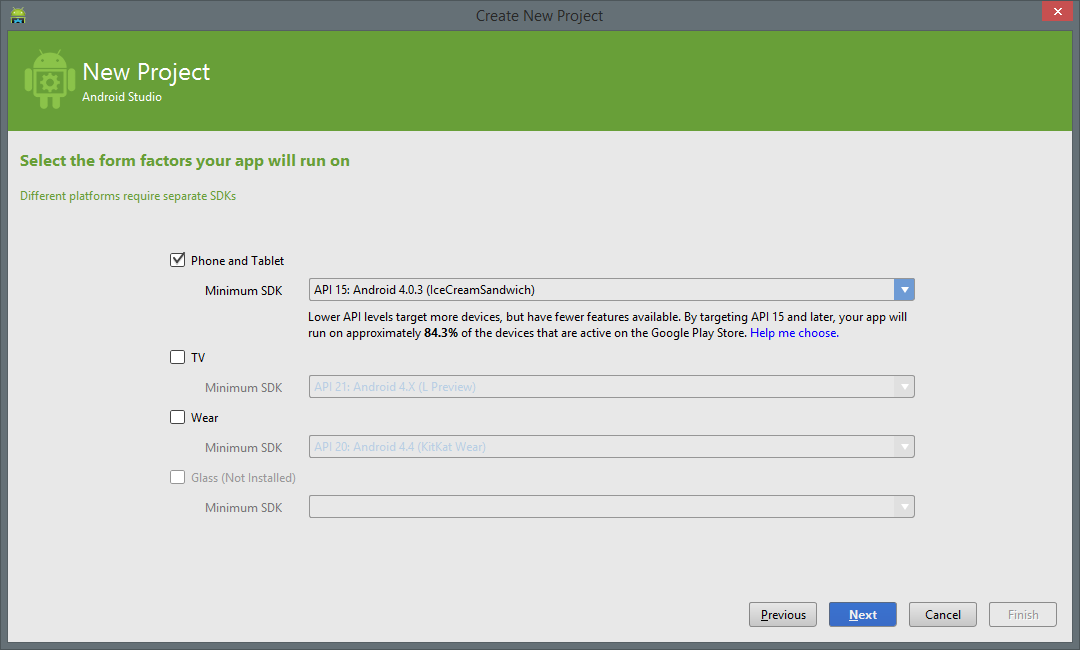
| + | *Select a Minimum SDK for this demo we will use API15 : IceCreamSandwich | ||
| + | [[File:AnroidStudioConfigureNewProjectSDK.PNG|Alt]] | ||
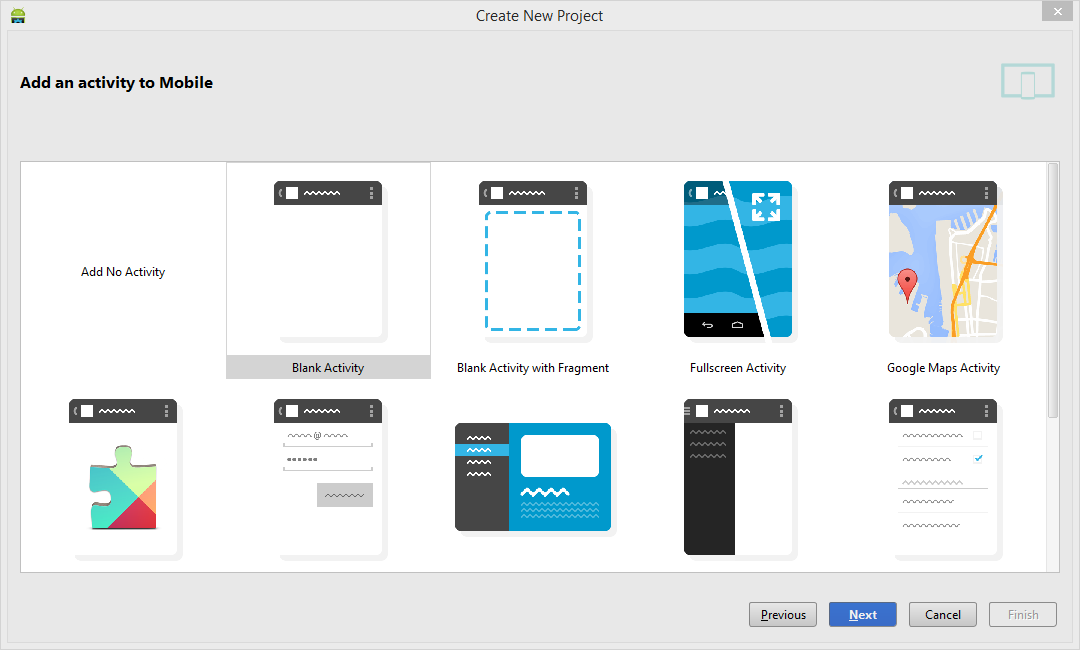
| + | *Select Blank Activity for the Project template | ||
| + | [[File:AndroidStudioBlankActivity.PNG|Alt]] | ||
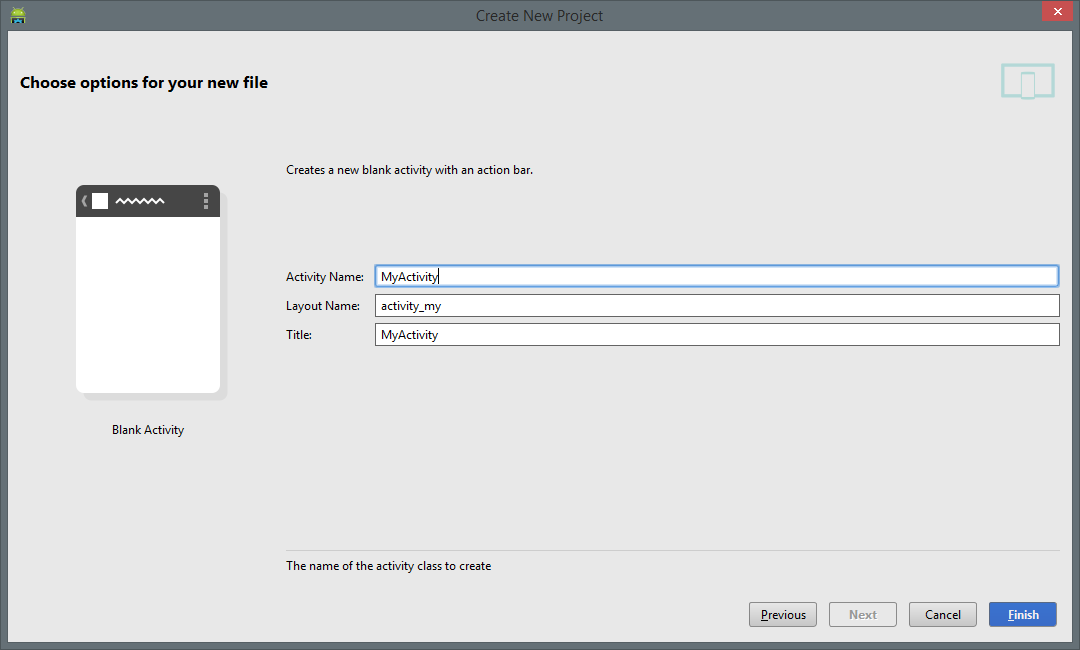
| + | *The defaults are fine for the activity name select next | ||
| + | [[File:AnroidStudioNewProjectAcvtivity.PNG|Alt]] | ||
| + | |||
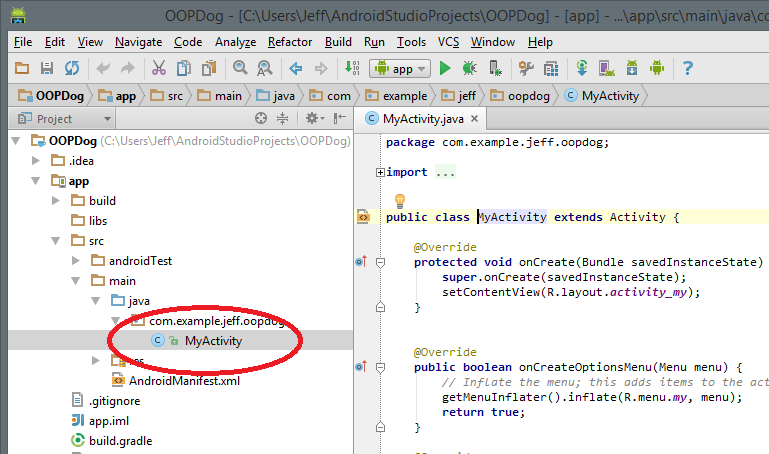
| + | *After a minute or so you can open the Project window if it isn't already open Att-1 or View/Tool Windows/Project | ||
| + | [[File:AndroidStudioShowOpenMyActivity.png|Alt]] | ||
| + | *Add Dog class | ||
| + | [[File:AndroidStudioNewClass.png|Alt]] | ||
| + | *Name the class Dog | ||
| + | [[File:AndroidStudioNewClassName.PNG|Alt]] | ||
| + | |||
| + | *Here is the c# dog class we have been using we need to change it a bit | ||
| + | [[Android Studio CSharpDog Code]] | ||
| + | |||
| + | [[File:AndroidStudioCSharpDog.PNG|Alt]] | ||
| − | + | *In Java [[Android Studio JavaDog]] | |
| − | + | [[File:AndroidStudioJavaDog.PNG|Alt]] | |
| − | |||
| − | |||
| − | |||
| − | |||
| − | |||
| − | |||
| − | |||
| − | |||
| − | |||
Latest revision as of 19:40, 8 November 2016
Contents
Android Basics
- Install 32 or 64 bit Java JDK http://www.oracle.com/technetwork/java/javase/downloads/jdk7-downloads-1880260.html
- App Inventor Pretty basic web interface an blocks editor to build simple android apps http://appinventor.mit.edu/about/
- Setup App Inventor http://appinventor.mit.edu/
- Android SDK
- http://developer.android.com/sdk/index.html
- Download Android Studio
- For SDK path we will use c:\user\Android
- Android NDK
- we're not covering this http://developer.android.com/sdk/ndk/index.html
Basics
- src folder containing all the source
- res folder containing all the resources
folder hierarchy explained http://developer.android.com/tools/projects/index.html
First app demo http://developer.android.com/training/basics/firstapp/running-app.html
App lifecycle http://developer.android.com/guide/components/activities.html

Resources
No DPI or PPI Andoid uses dp density independent pixels or sp scale interdependent pixels http://developer.android.com/guide/topics/resources/more-resources.html#Dimension
also see supporting multiple screens http://developer.android.com/guide/practices/screens_support.html
Activities
Activity life cycle http://developer.android.com/guide/topics/fundamentals/activities.html#Lifecycle
Get an instance of an object from the R class
/** Called when the activity is first created. */
    @Override
    public void onCreate(Bundle savedInstanceState) {
        super.onCreate(savedInstanceState);
        setContentView(R.layout.main);

        //Get the Button and the TextView from the Resource class
        Button btn = (Button)this.findViewById(R.id.button1); //needs import android.widget.Button;

        //Final in java can only be initialized once this is necessary to for use in inner method
        final TextView tv = (TextView)this.findViewById(R.id.textView1);  //needs import android.widget.TextView;
        String s = "hello";
        tv.setText(s);
    }
notice the cast to the type also notice that the TextView is marked as final
this is so that we can use it in an inner method
handle a click event
btn.setOnClickListener(new View.OnClickListener() {

			@Override
			public void onClick(View v) {
				// TODO Auto-generated method stub
				tv.setText(d.About());
			}
		});
We can also do this without the inner method by declaring a click method in the class
public void buttonPressMe_OnCLick(View v)
    {
        TextView tv = (TextView)this.findViewById(R.id.textView2);
        tv.setText("Hello From Button!!");
    }
Then we can set the click handler in the layout xml in out case acivity_main.xml
<Button
        android:text="Press Me"
        android:layout_width="wrap_content"
        android:layout_height="wrap_content"
        android:layout_below="@+id/textView"
        android:layout_alignParentLeft="true"
        android:layout_alignParentStart="true"
        android:layout_marginLeft="13dp"
        android:layout_marginStart="13dp"
        android:layout_marginTop="24dp"
        android:id="@+id/buttonPressMe"
        android:onClick="buttonPressMe_OnCLick (MainActivity)" />
Events
Lots more good reading http://developer.android.com/guide/topics/fundamentals.html
AVD
Dog Class in java
public class Dog {
    public String Name; //Java uses capital S String
    public int Weight;
    public String BarkSound;

    //Constructor
    public Dog()
    {
        this.Name = "fido";
        this.Weight = 1;
        this.BarkSound = "woof";
    }

    public void Eat()
    {
        this.Weight++;
    }
    public void Poop()
    {
        this.Weight--;
    }

    public String About()
    {
        //Java string.format is similar to c# but used %s for string substitution
        return String.format("Hello my name is %s. I weigh %s lbs",
                this.Name, this.Weight);
    }
}
In Class Demo
- Get and install Android Studio this demo uses 2.2 https://developer.android.com/sdk/installing/studio.html
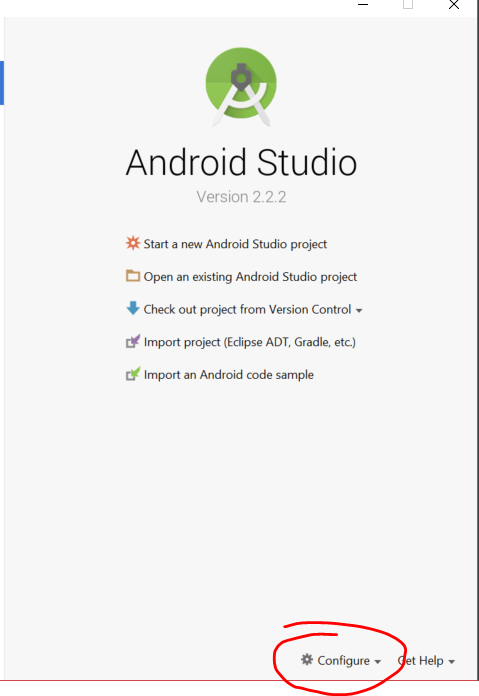
- Start Android Studio
- Select Configure
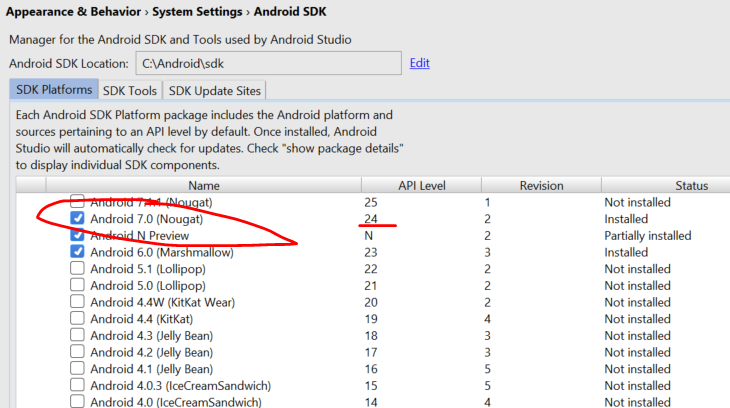
- Select Android SDK Manager
- Make sure you have a current SDK for this Demo we will use 24
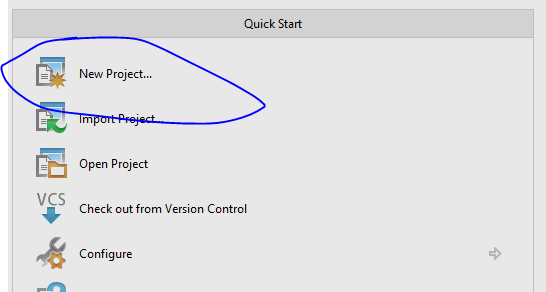
- Go back to the main menu and select New Project
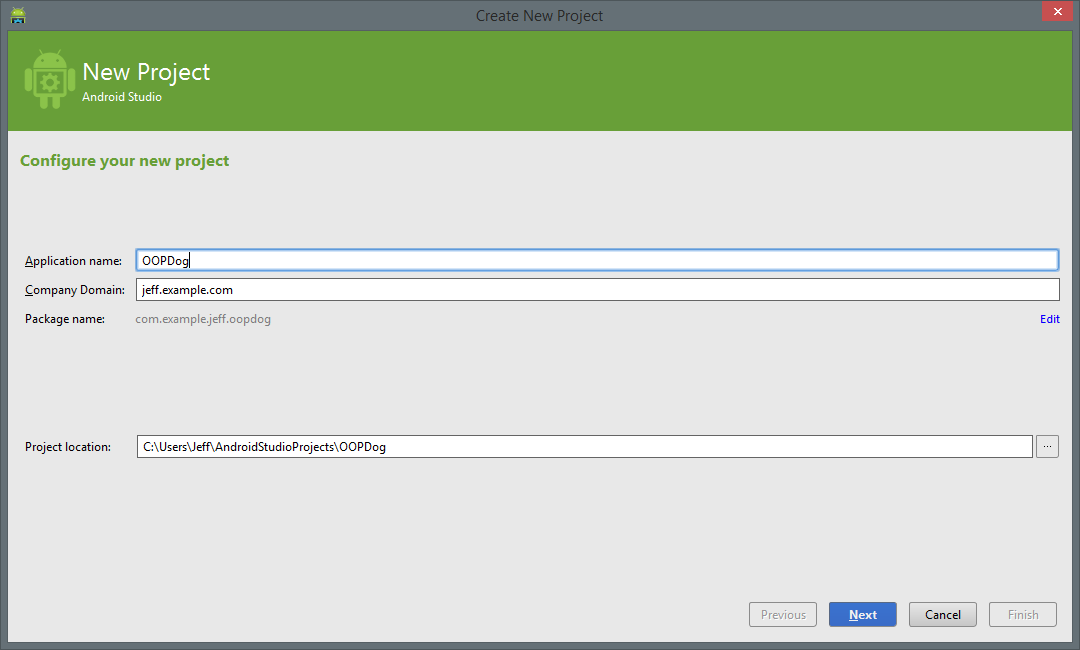
- Name the Project OOPDog and select Next
- Select a Minimum SDK for this demo we will use API15 : IceCreamSandwich
- Select Blank Activity for the Project template
- The defaults are fine for the activity name select next
- After a minute or so you can open the Project window if it isn't already open Att-1 or View/Tool Windows/Project
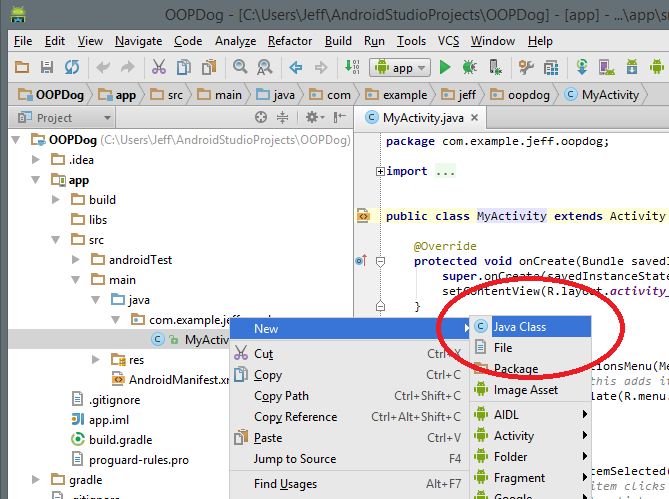
- Add Dog class
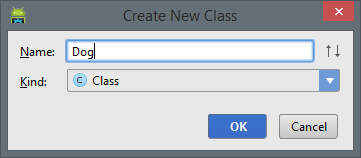
- Name the class Dog
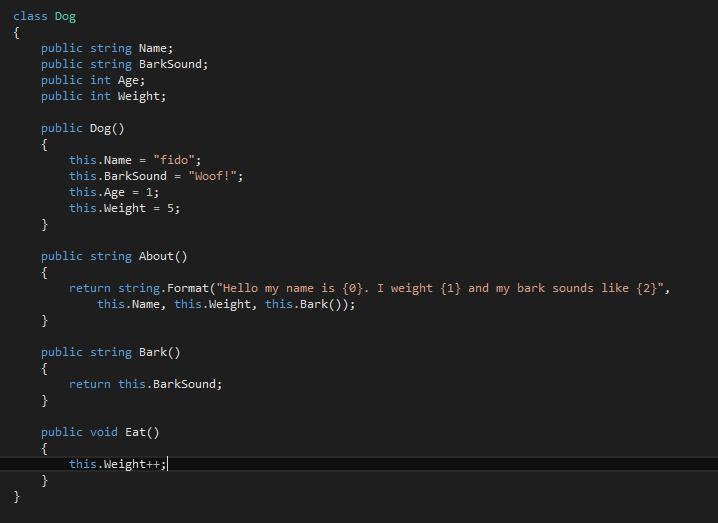
- Here is the c# dog class we have been using we need to change it a bit
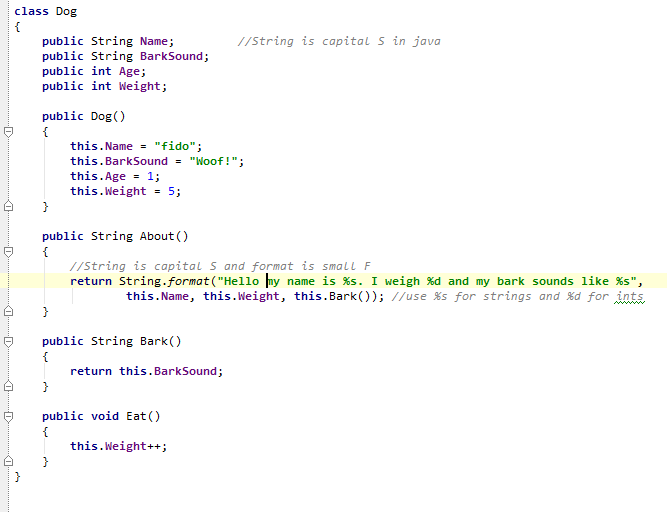
- In Java Android Studio JavaDog
