Sony V1U Kit
Contents
Professional Video Camera Kit - Sony V1U
The Sony V1U is a HDV 1080i/Mini DV advanced video camera with 20x optical zoom
This kit requires a mini DV tape to record.
This kit also comes with several cords including USB-to-USB Mini, Power Cable, AC adapter, Firewire, Composite Audio/Video Cable and Component Video Cable.
Other Accesories included with the kit are a Directional Microphone and a Remote.
This camera is available to students with Video Advanced clearance.
What's in the kit?

|

|

|

|

|

|
| Video Camera Bag | Sony V1U | Directional Microphone | Sony Remote | USB-to-USB Mini | Battery |

|

|

|

|

| |
| Power Cable | AC Adaptor | Composite Audio/Video | Component Video | Firewire |
Other items you will need.
You will need to buy a Mini DV HD Tape in order to record data.
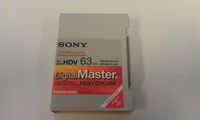
|
How to attach the battery

|

|

|
Image one shows the battery slot without a battery in it. To insert the battery simply line it up and slide it into the slot. Image two shows the battery slot with the battery attached.
To take the battery out press the "Batt Release" button located just above the battery slot as show in image three.
How to insert a tape
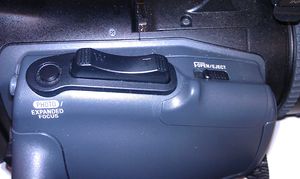
First slide the Open/Eject Switch to pop open the tape compartment.
|
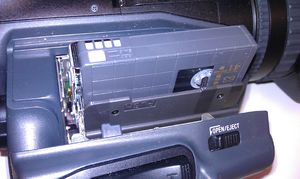
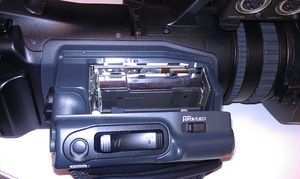
Next wait for the tape holder to completely open itself.

|
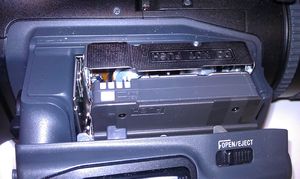
Then slide the tape into the slot.
|
|
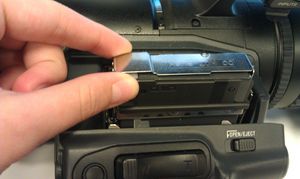
Last pinch the tape slot closed with your fingers and wait for the slot to completely retract. Then close the compartment.
|
|
How to attach the microphone
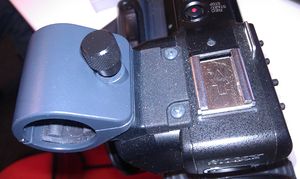
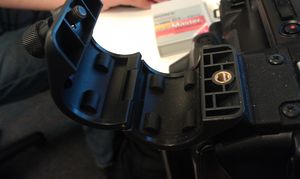
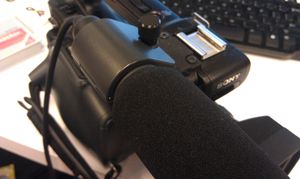
First unscrew the mic holder on the top of the camera, place the microphone inside the holder and reattach the screw
|
|
|
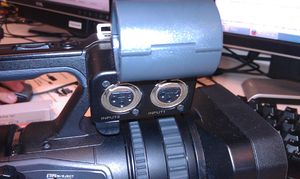
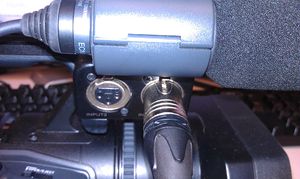
Next you need to plug in the mic to the input. Be aware that there are two inputs, so make sure you know which one you are plugging into.
|
|
Modes and Settings
The Sony V1U Camera has many different settings that you will want to become familiar with before using this camera.
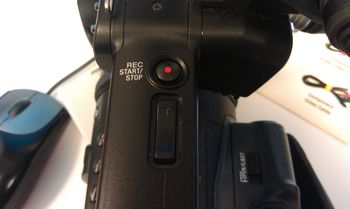
The fist basic function is how to record and playback video. There are two different locations to record and zoom. The first is located on top of the camera and the other on the right which is accessible while using the hand strap. This location is also where you turn the camera on/off and switch between Camera and VCR modes.
|

|
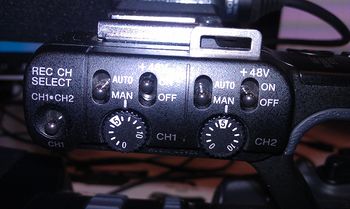
The audio settings for each input are located on the opposite side of the mic holder that the inputs are on. Each input has settings for auto or manual as well as on and off. There is also a channel select switch so you can switch between CH1 and CH2.
|
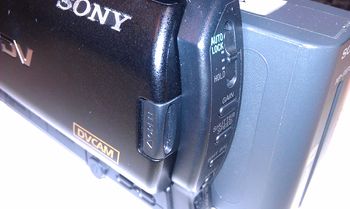
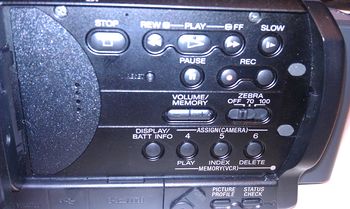
There is a switch to open the viewing screen on the back left of the camera. On the inside of this screen are buttons that control different functions of the camera. Such as play, rewind etc. for playing back footage
|
|
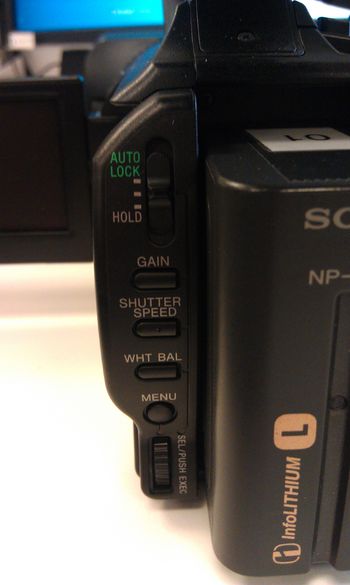
Also located on the back left of the camera are buttons and settings for Gain, Shutter Speed, White Balance and Menu. When any of these buttons are pressed the corresponding menu will appear on the viewing screen. Use the scroll wheel under the menu button to scroll though and select different options and settings.
|
Lens Maintenance
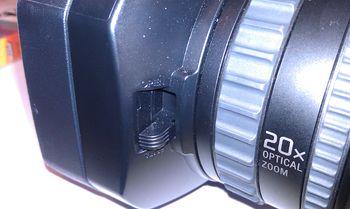
To Open/Close the lens cover simple flip the switch located on the front left side of the camera
|
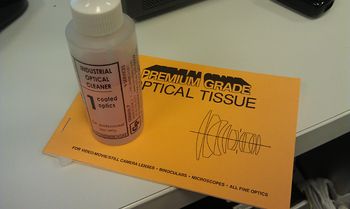
To clean the lens you will need two things.
- Optical Tissue
- Optical Cleaner
|
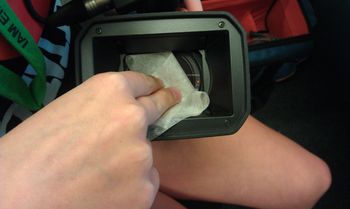
To clean put a drop of the optical cleaner in the center of the lens, then wipe with the optical tissue

|
|