Fab Lab Room 125 - Large Format Printing
esse quam videri
Contents
Large Format Printer
Paper Type
- Luster
- Luster Paper PDF http://www.epson.com/cmc_upload/0/000/019/128/Copy%20of%20Premium%20Luster%20rev%201.pdf
- Glossy
- Enhanced Matted
- Enhanced Matted Paper http://www.epson.com/cgi-bin/Store/ProductMediaSpec.jsp?oid=-10389
- Single Weight
- Single Weight Paper http://www.epson.com/cgi-bin/Store/ProductMediaSpec.jsp?infoType=Overview&oid=-11184&ref=r0302DMb9U
- Special
- Special Paper NA
Printer Setup
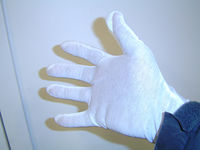
- When setting up the paper for the printer make sure you wear the white gloves while handling the paper.
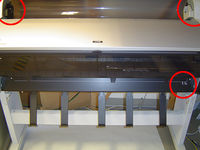
- Then load the paper into top tray on the printer. Make sure you line up black with black and grey with gray when loading the printing paper.
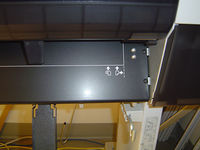
- Then pull it trough the printer gently so there will be no creasing. You can stop feeding it trough once the paper lines up with marker at the bottom of the printer. After that make sure the top tray is pulled back down to cover the paper.
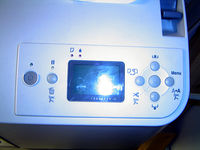
- After that is said and done make sure the Cut paper option is on then you are ready to start printing. (that is the button with the scissor under it)
Computer Setup
- If the computer is already logged in log out then log into the print account. (If you are trained in the large format printer the password will be provided to you.)
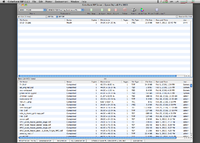
- Once you log in start up the Color-Burst Program. This allows us to connect to the large format printer. Also note that the Rip setting should be off at this point.
- Once you set up your file (a Tiff from Photoshop or a PSD from Illustrator) you can drag it in to the waiting screen to be set up for printing.
- Why PSD from Illustrator? Because it will preserves the smoothness of the curves on top of getting it into the program as a small files size so it will print better & faster.
- Why tiff from Photoshop? Because it will compress the file without losing data as well as the printing will go faster & better.
- When printing get the color setting to Adobe RGB 1998. note:(This is not a hard and fast rule it just seems to have the best results)
- When setting up color burst to print take a look at the drop down menu and select the paper type you are printing to so you do not get any error's
- 720 DPI is good for most school projects and printing on matted\normal paper It also works very well for glossy and Luster even though it is not the best quality but it should easily handle almost all of your needs.
- 1440 DPI Should only really be used for high quality Luster or glossy or another type of special printing paper.
- 2880 DPI is almost a waist of ink there will generally be no real discernible difference to the naked eye of this level of printing though if you want the best of the best then this is it but it may overload the paper with ink. (USE WITH CAUTION)
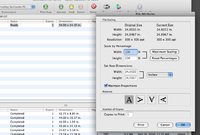
- When setting up the file in ColorRip you can double click it and get the option box with all the attributes you need to edit it. Note:(the max printer with is 44 inches and length can be as long as you need it to be.)
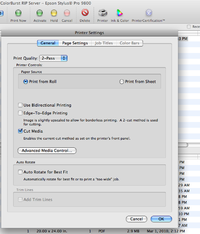
- The other setting you should be looking at is Printer setting witch is the printers Icon at the top.
- Print Quality: 2pass is how many times the printer goes over a single line with ink. 2pass is more than efficient for all 770 DPI prints. 4 & 6pass will give you more ink but at the same time can over saturate your page and make it wet and wrinkled due to the amount applied (use with caution)
- Always Print From roll and always make sure Cut media is checked.
- Use Bidirectional Printing, it will make it so the printing goes faster and it will be more than enough for most printing needs.
Printing
- When you are ready to print you can right click on the statue and change to ready and you can now check rip on. From there it should start printing.
Printing Tips
- When you are getting ready to print but are unsure if the color and print settings set up a 44 wide and 1 inch long strip to see the color and quality match what you are trying to achieve.
- When you need to stop a print make sure you do it from the printer side and not from the computer


